-
Changing the air spring: Easier than expected
- Step 1: Measure the construction position of the vehicle (“K0” = construction position 0)
- Step 2: Pull fuse when replacing BMW F11 air suspension
- Step 3: Emptying of the air suspension
- Step 4: The removal of the air spring
- Step 5: Insert the air spring
- Step 6: Align the air spring
- Step 7: Securing and filling the air spring
- Step 8: Carefully lower the vehicle
- Step 9: Do not forget the test drive

BMW F11 air spring: How to replace the air spring in the 5 Series Touring with ease
Time and again, our experts at the BILSTEIN Academy are faced with questions relating to the replacement of air springs. In this article, we use the BMW 5 Series F11 as an example to show how easy it is to replace a defective BMW air spring:
Changing the air spring: Easier than expected
“While full air suspensions were rare ten years ago, even then there were many station wagons with pneumatic rear suspension in the upper mid-range segment,” explains Dimitris Kouvaras (Global Training Manager, BILSTEIN Academy), referring to the BMW 5 Series Touring produced between 2010 and 2017. And because the BMW station wagons with the internal code F11 have now been in use for a number of years, they are now having to go to the workshop more and more frequently.
Replacing air springs and air spring modules is easier than often assumed. However, there are some important aspects to consider during installation. After all, it is not uncommon that unnecessary – and expensive – assembly errors occur when installing new air springs.
Your technical partner for all workshop questions
We support you with all technical questions – even if the vehicle is already on the lift and you need information quickly. Workshop professionals can reach us at any time by e-mail or phone.
Contact us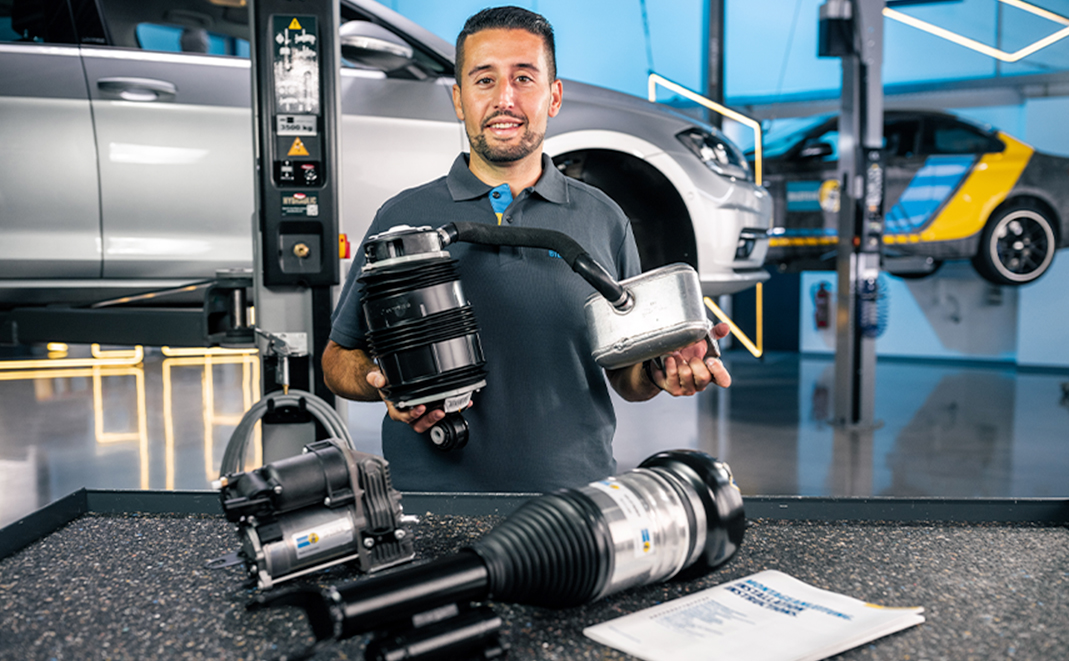
The automotive professional’s diagnosis: pressure loss at the rear right air spring
When this BMW 530d Touring arrived at our workshop, the diagnosis was quickly clear. Pressure loss at the right rear air spring, which serves as a level control. Replacement was therefore necessary. And it’s quite easy to do with a few tricks:
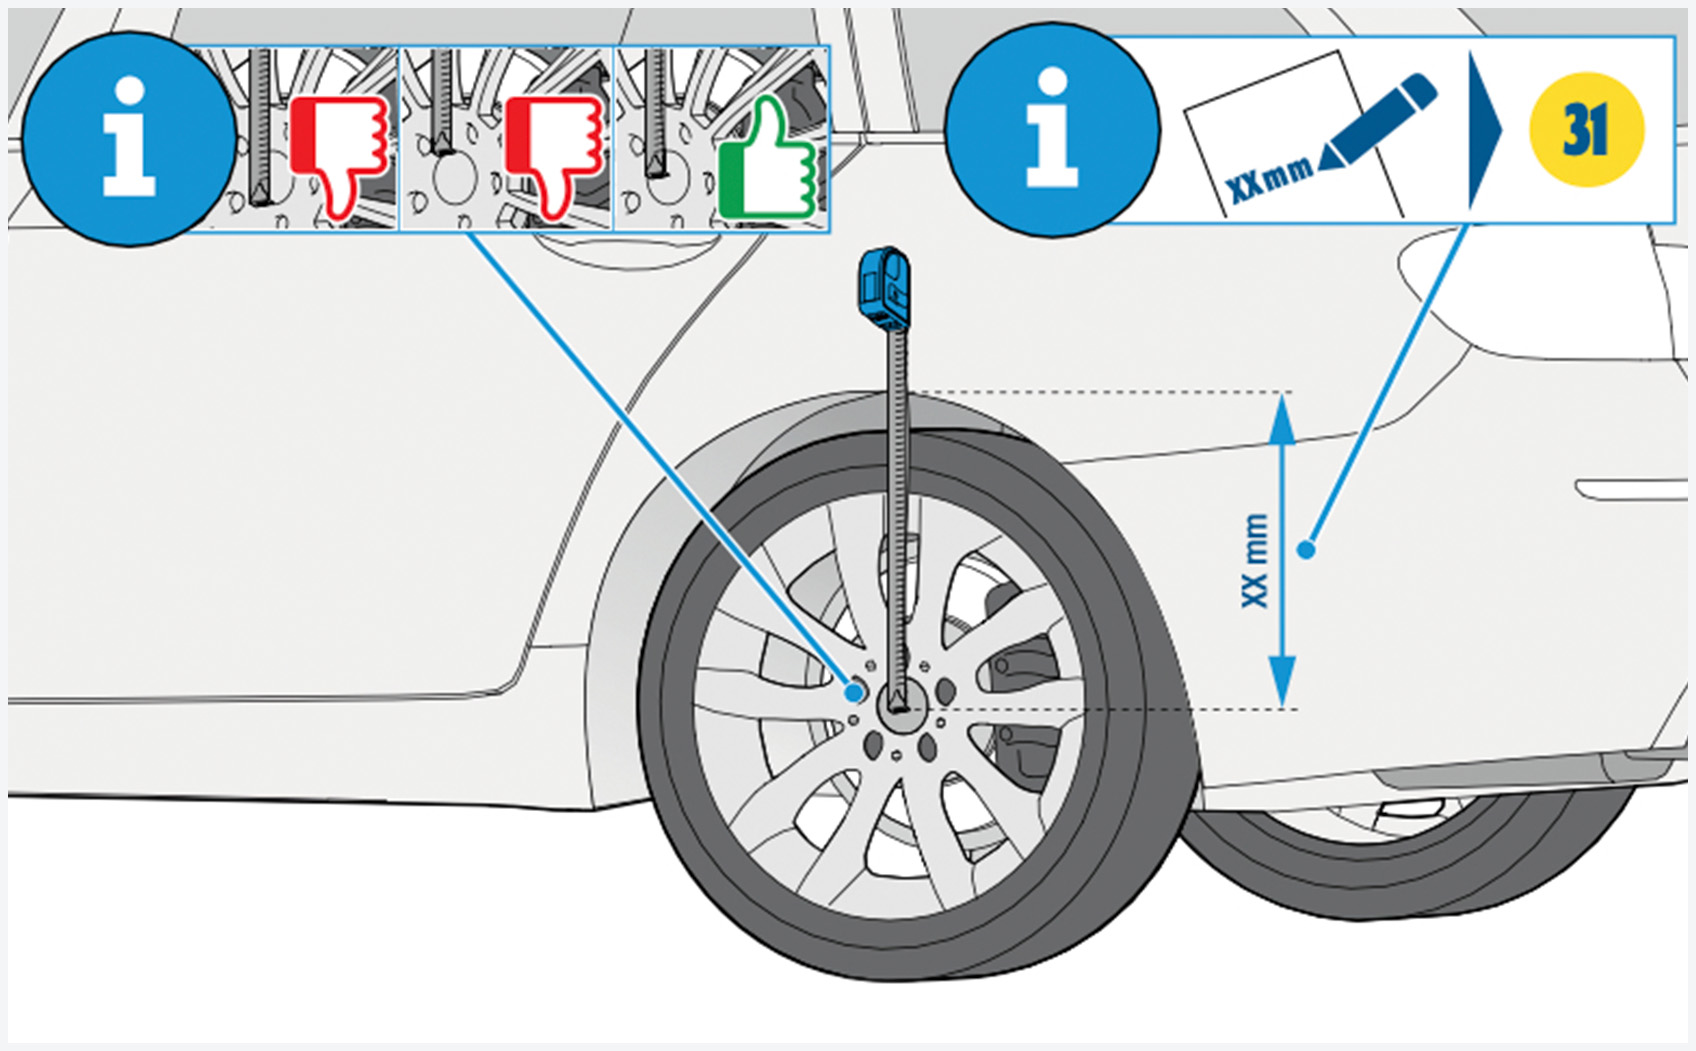
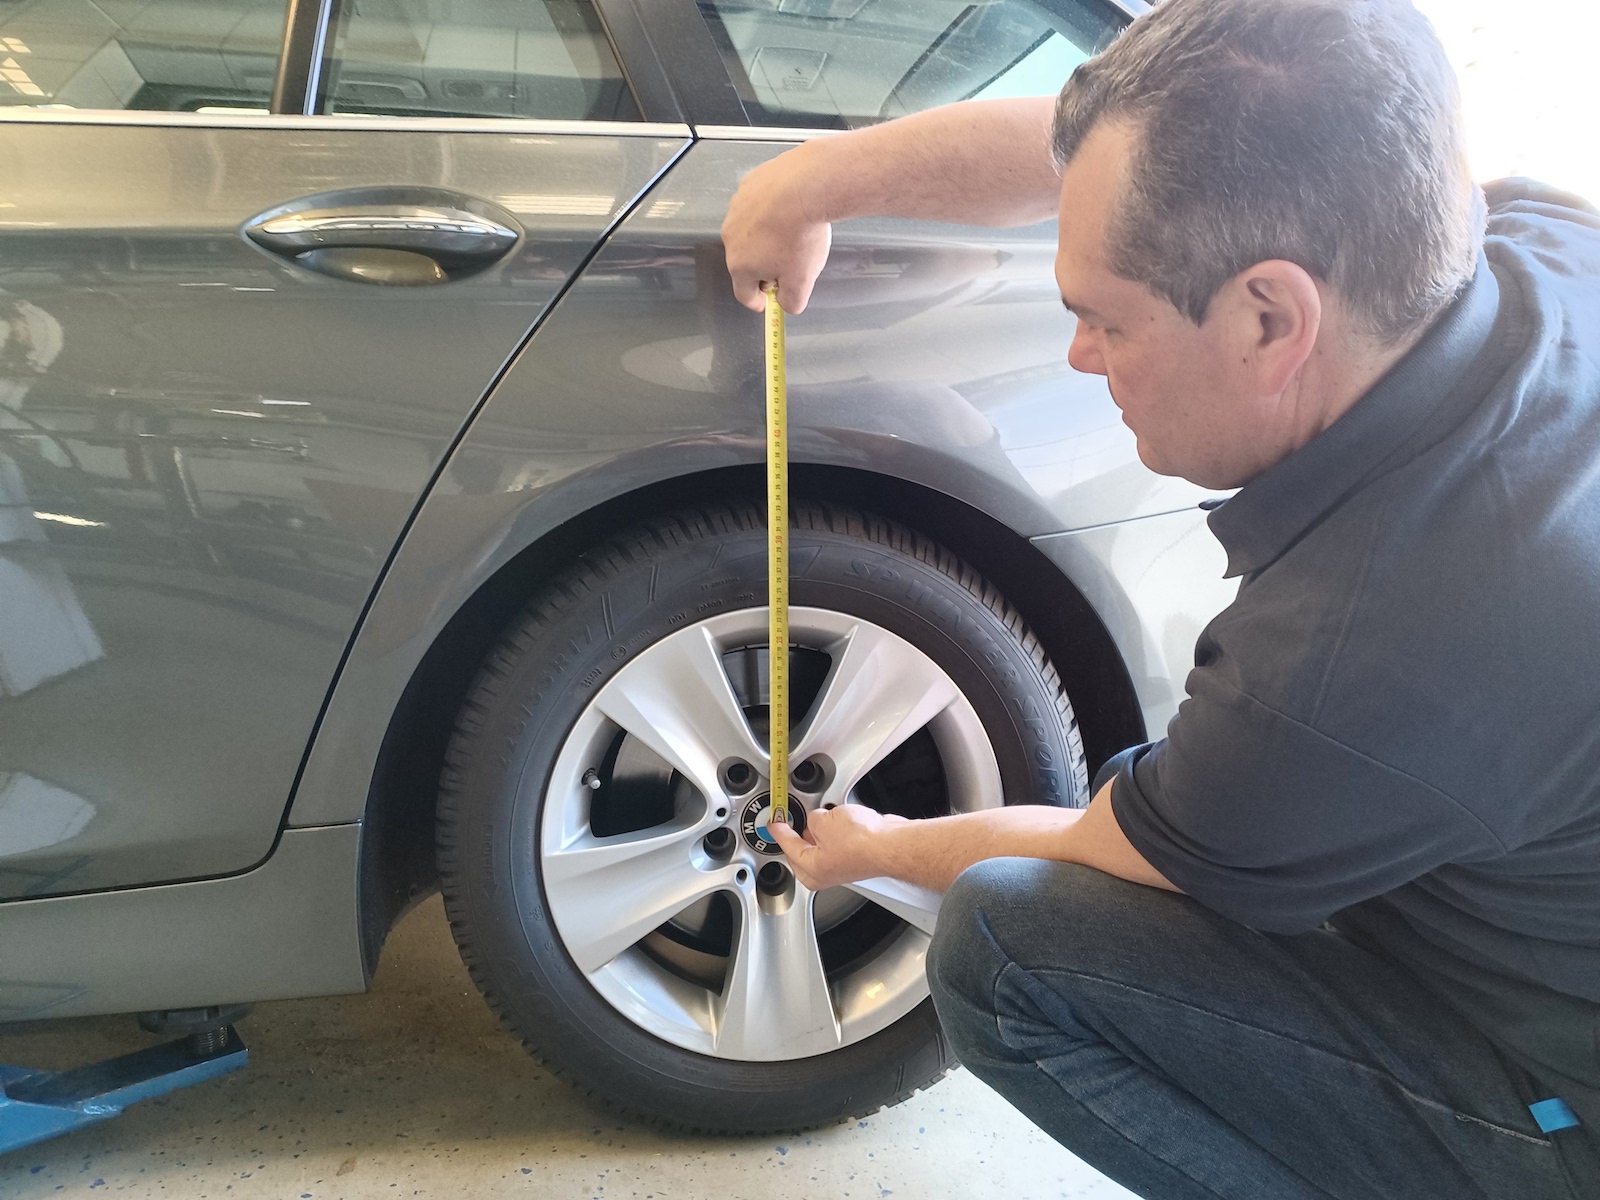
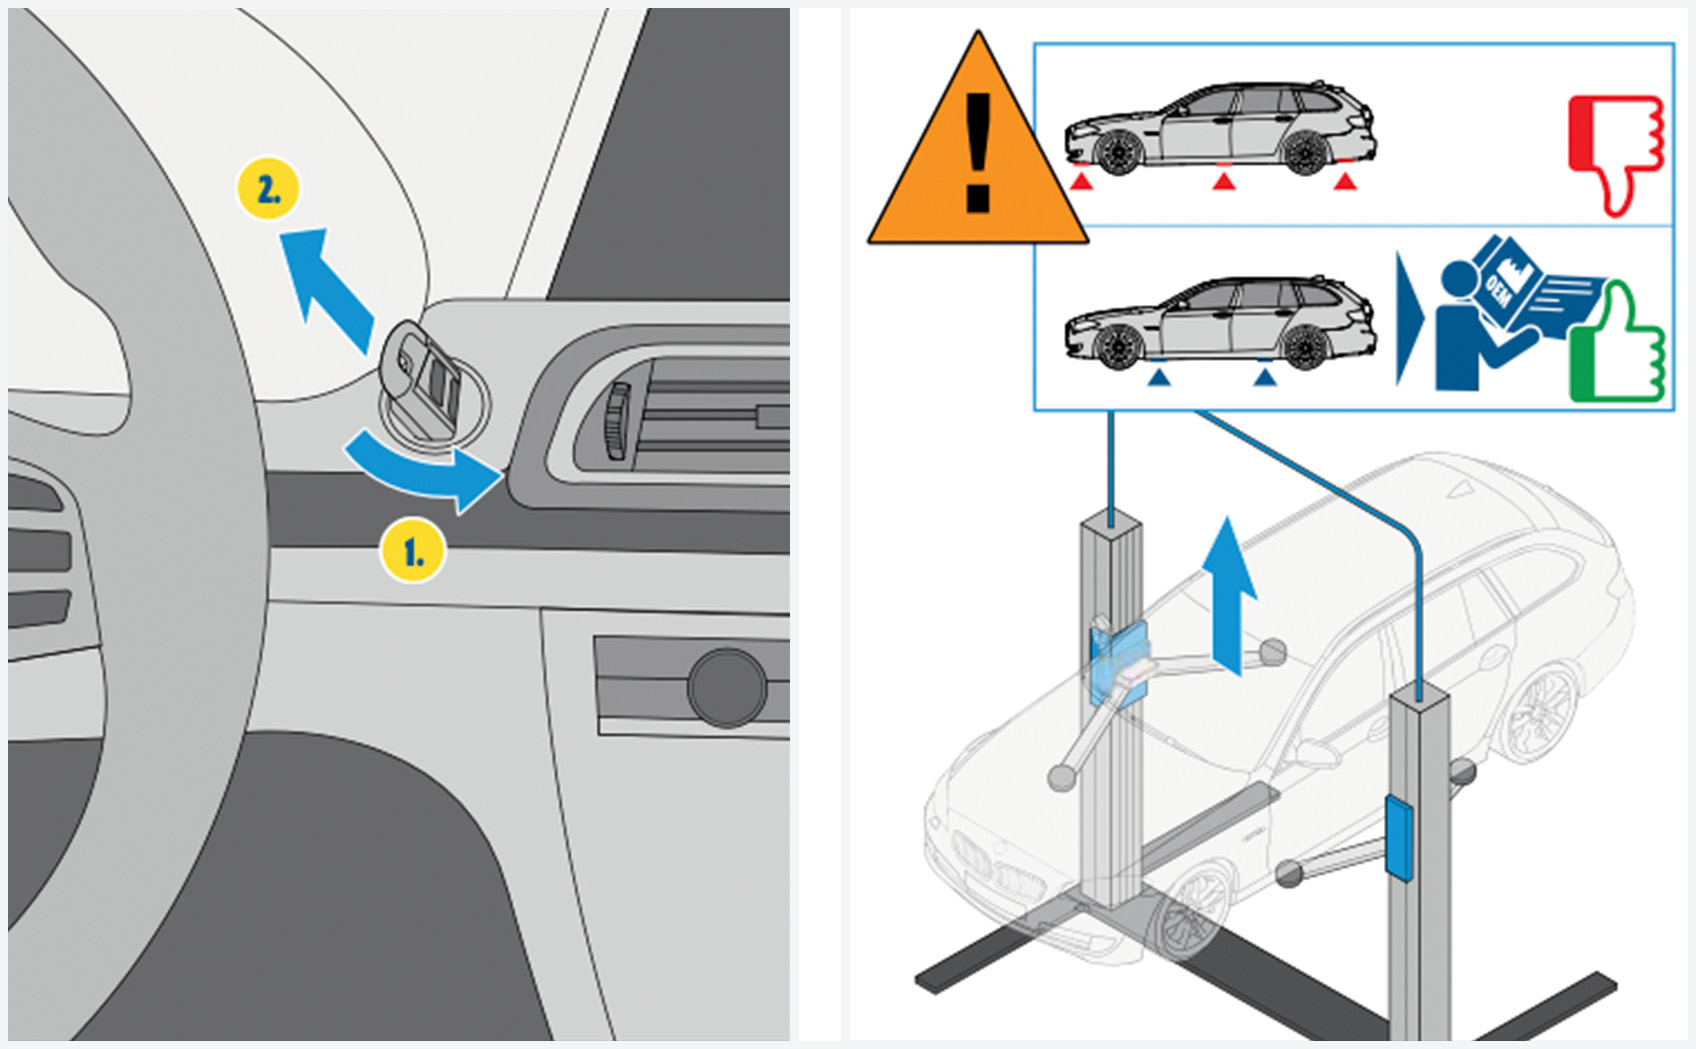
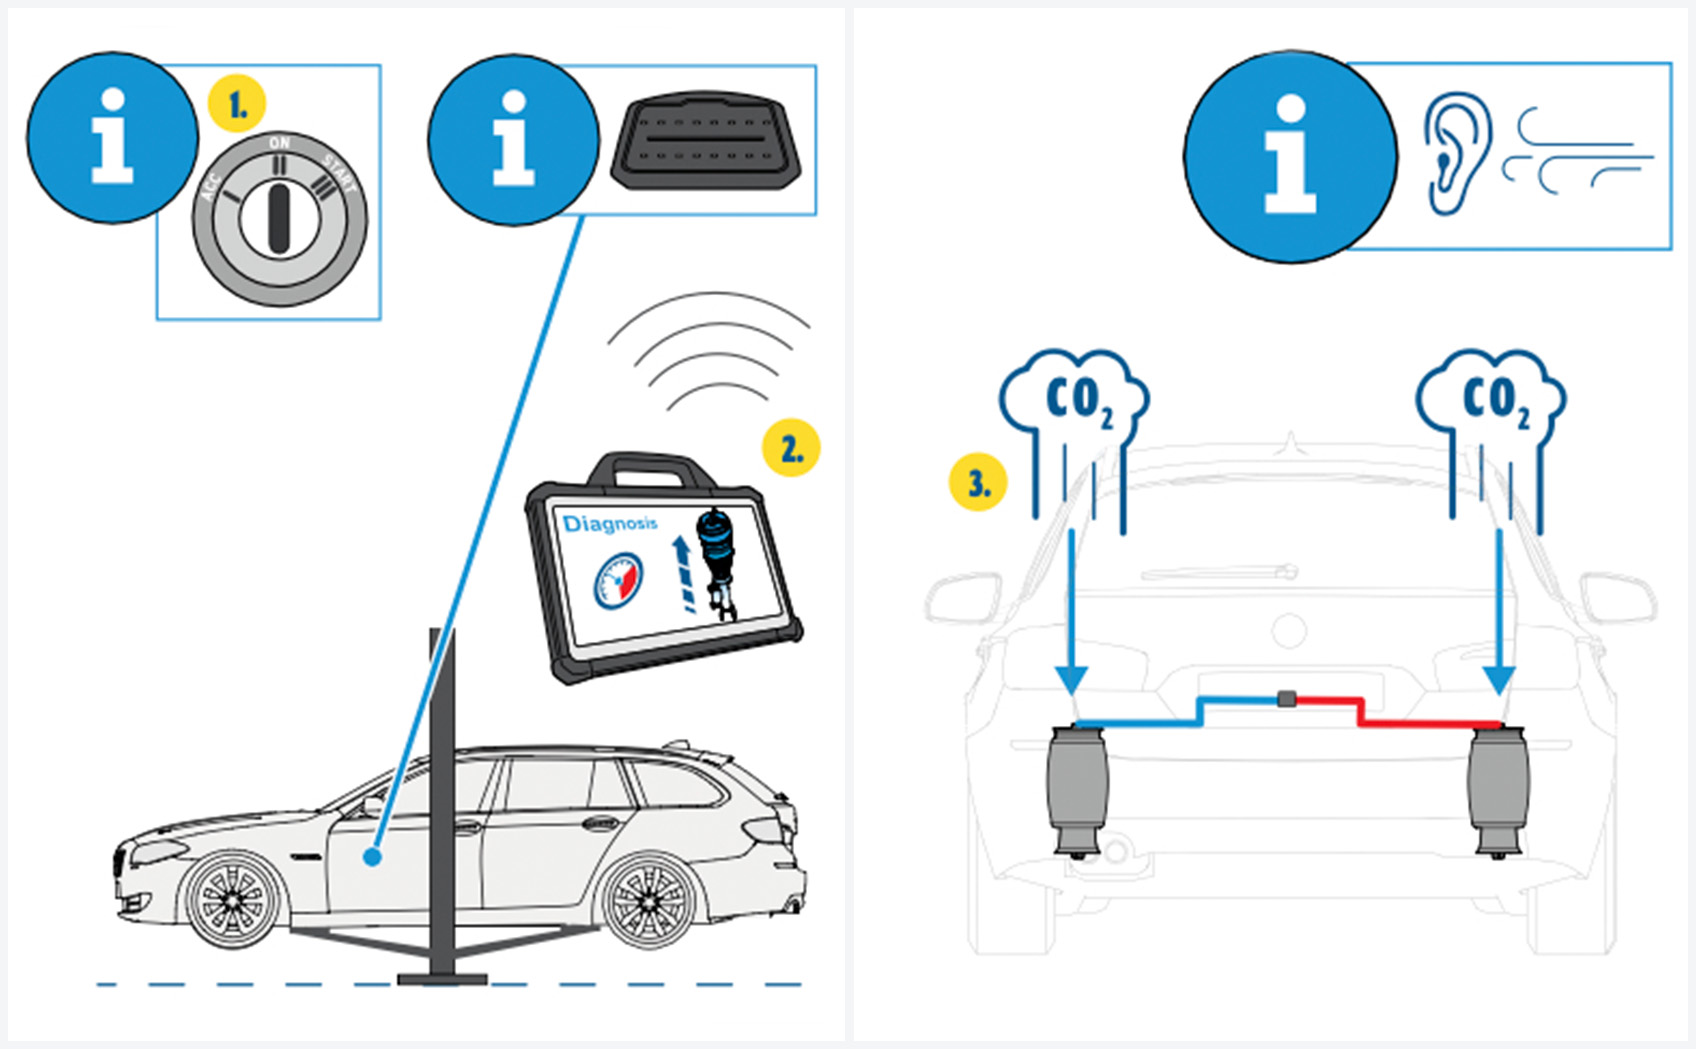
Step 1: Measure the construction position of the vehicle (“K0” = construction position o)
The first step is to measure the construction position 0 (K0 position) while the vehicle is standing on its wheels. To ensure that no pressure loss influences the vehicle height, the engine should have been running for at least two minutes beforehand. After that, the measurement can be taken without any problems even if the air spring is leaking, since air springs are rarely damaged to such an extent that they lose pressure abruptly. Of course, you should not take forever. After noting the values, the vehicle should be raised slightly on the lifting platform to stabilize it so that the suspension is not completely unloaded.
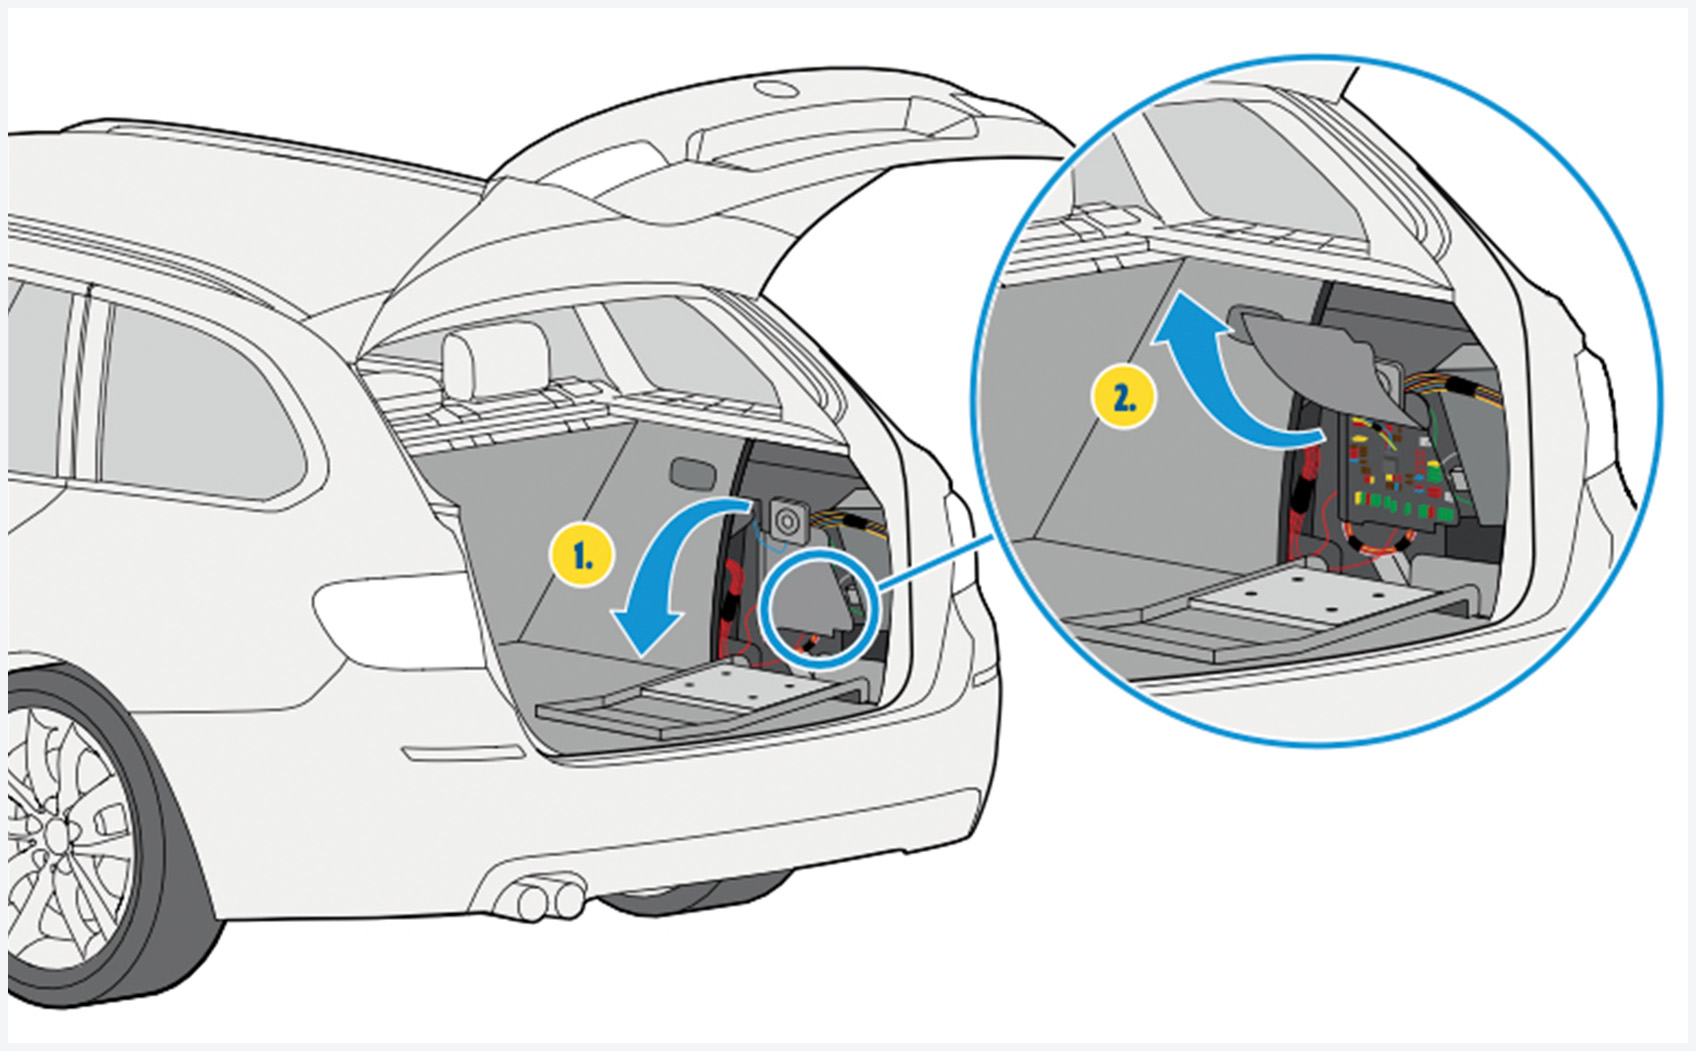
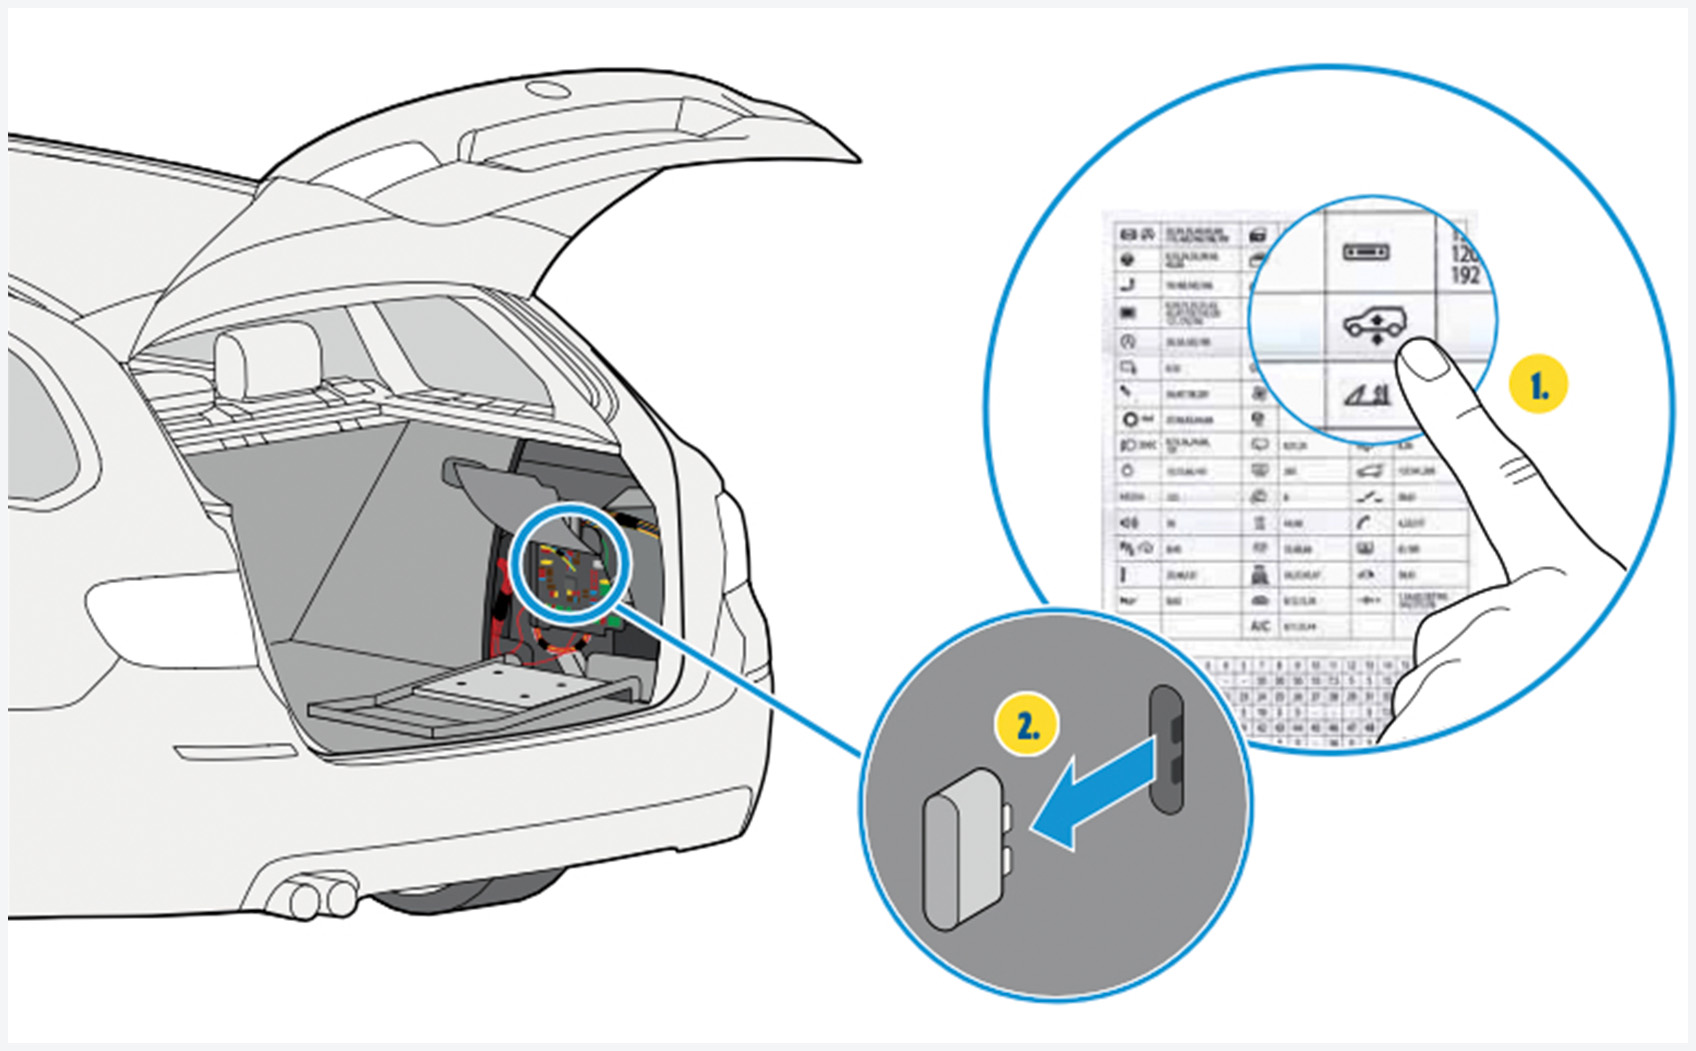
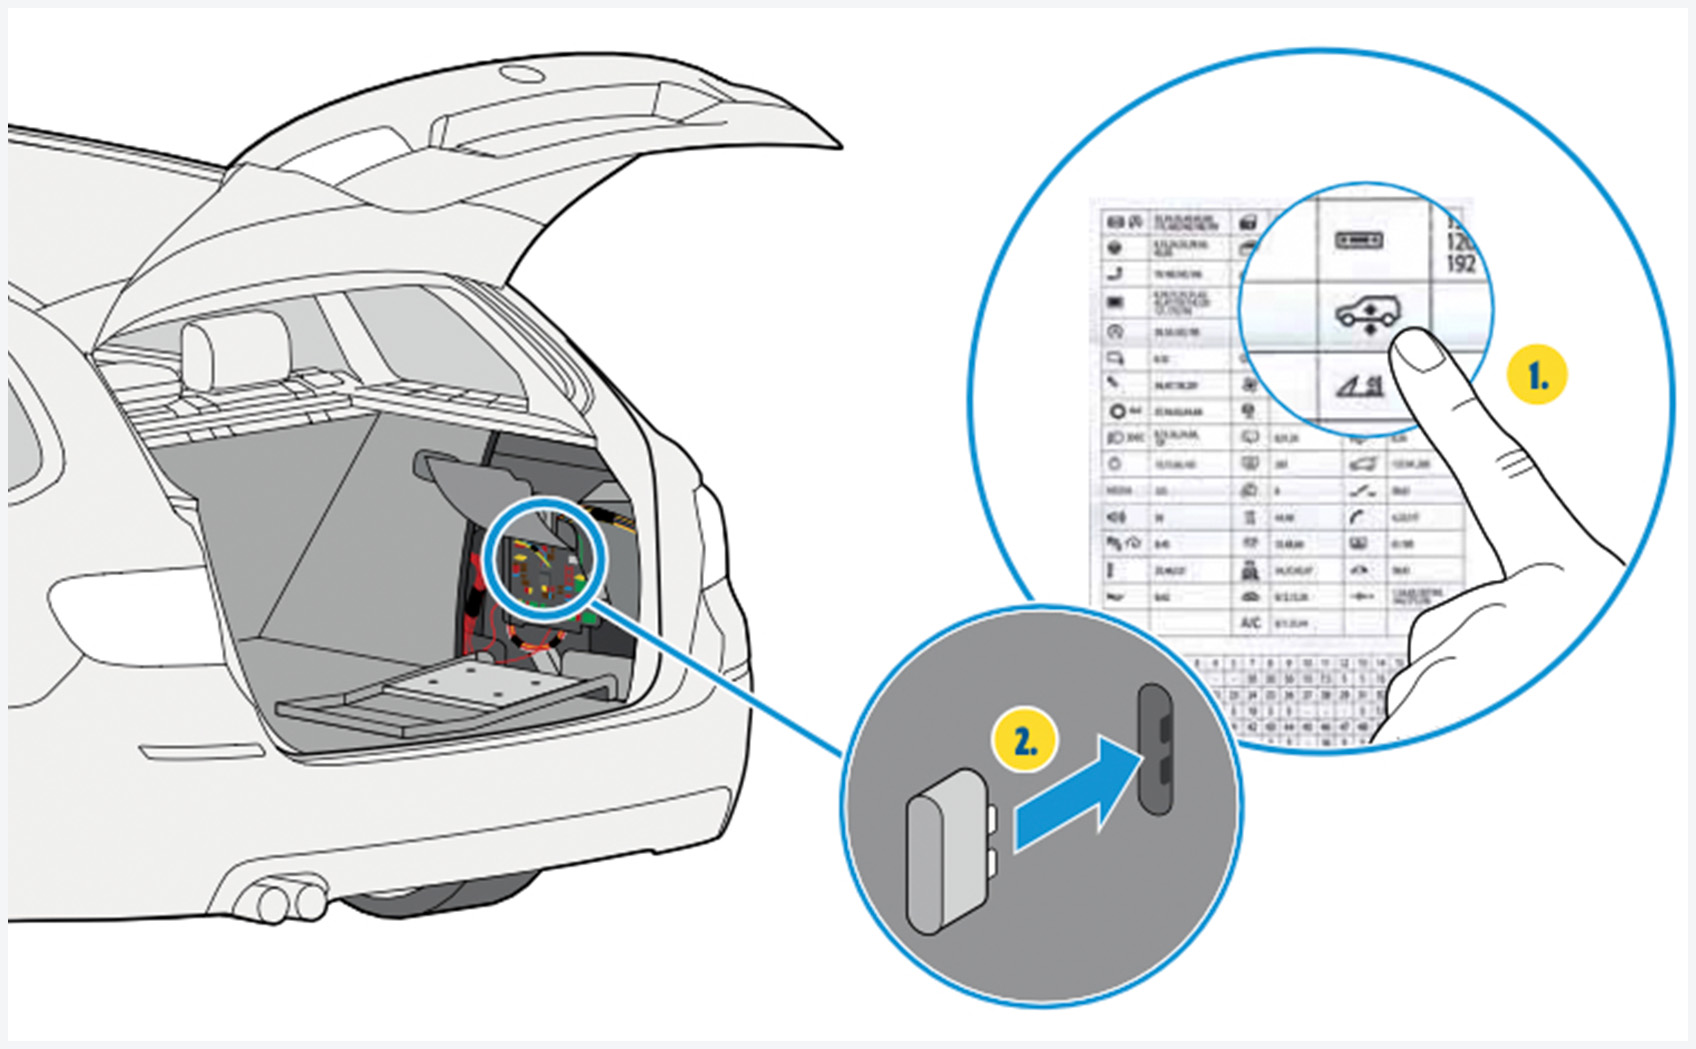
Step 2: Pull fuse when replacing BMW F11 air suspension
Then pull out fuse number F 182 (40 amps) from the fuse box on the right in the luggage compartment. It is responsible for the air supply system.
Step 3: Emptying of the air suspension
The next step is to connect the diagnostic device, which will later help to completely drain the air suspension. But before that, the ignition still has to be switched on. Since the suspension was only partially unloaded by the lift, the car’s own weight helps to push the air completely out of the spring.
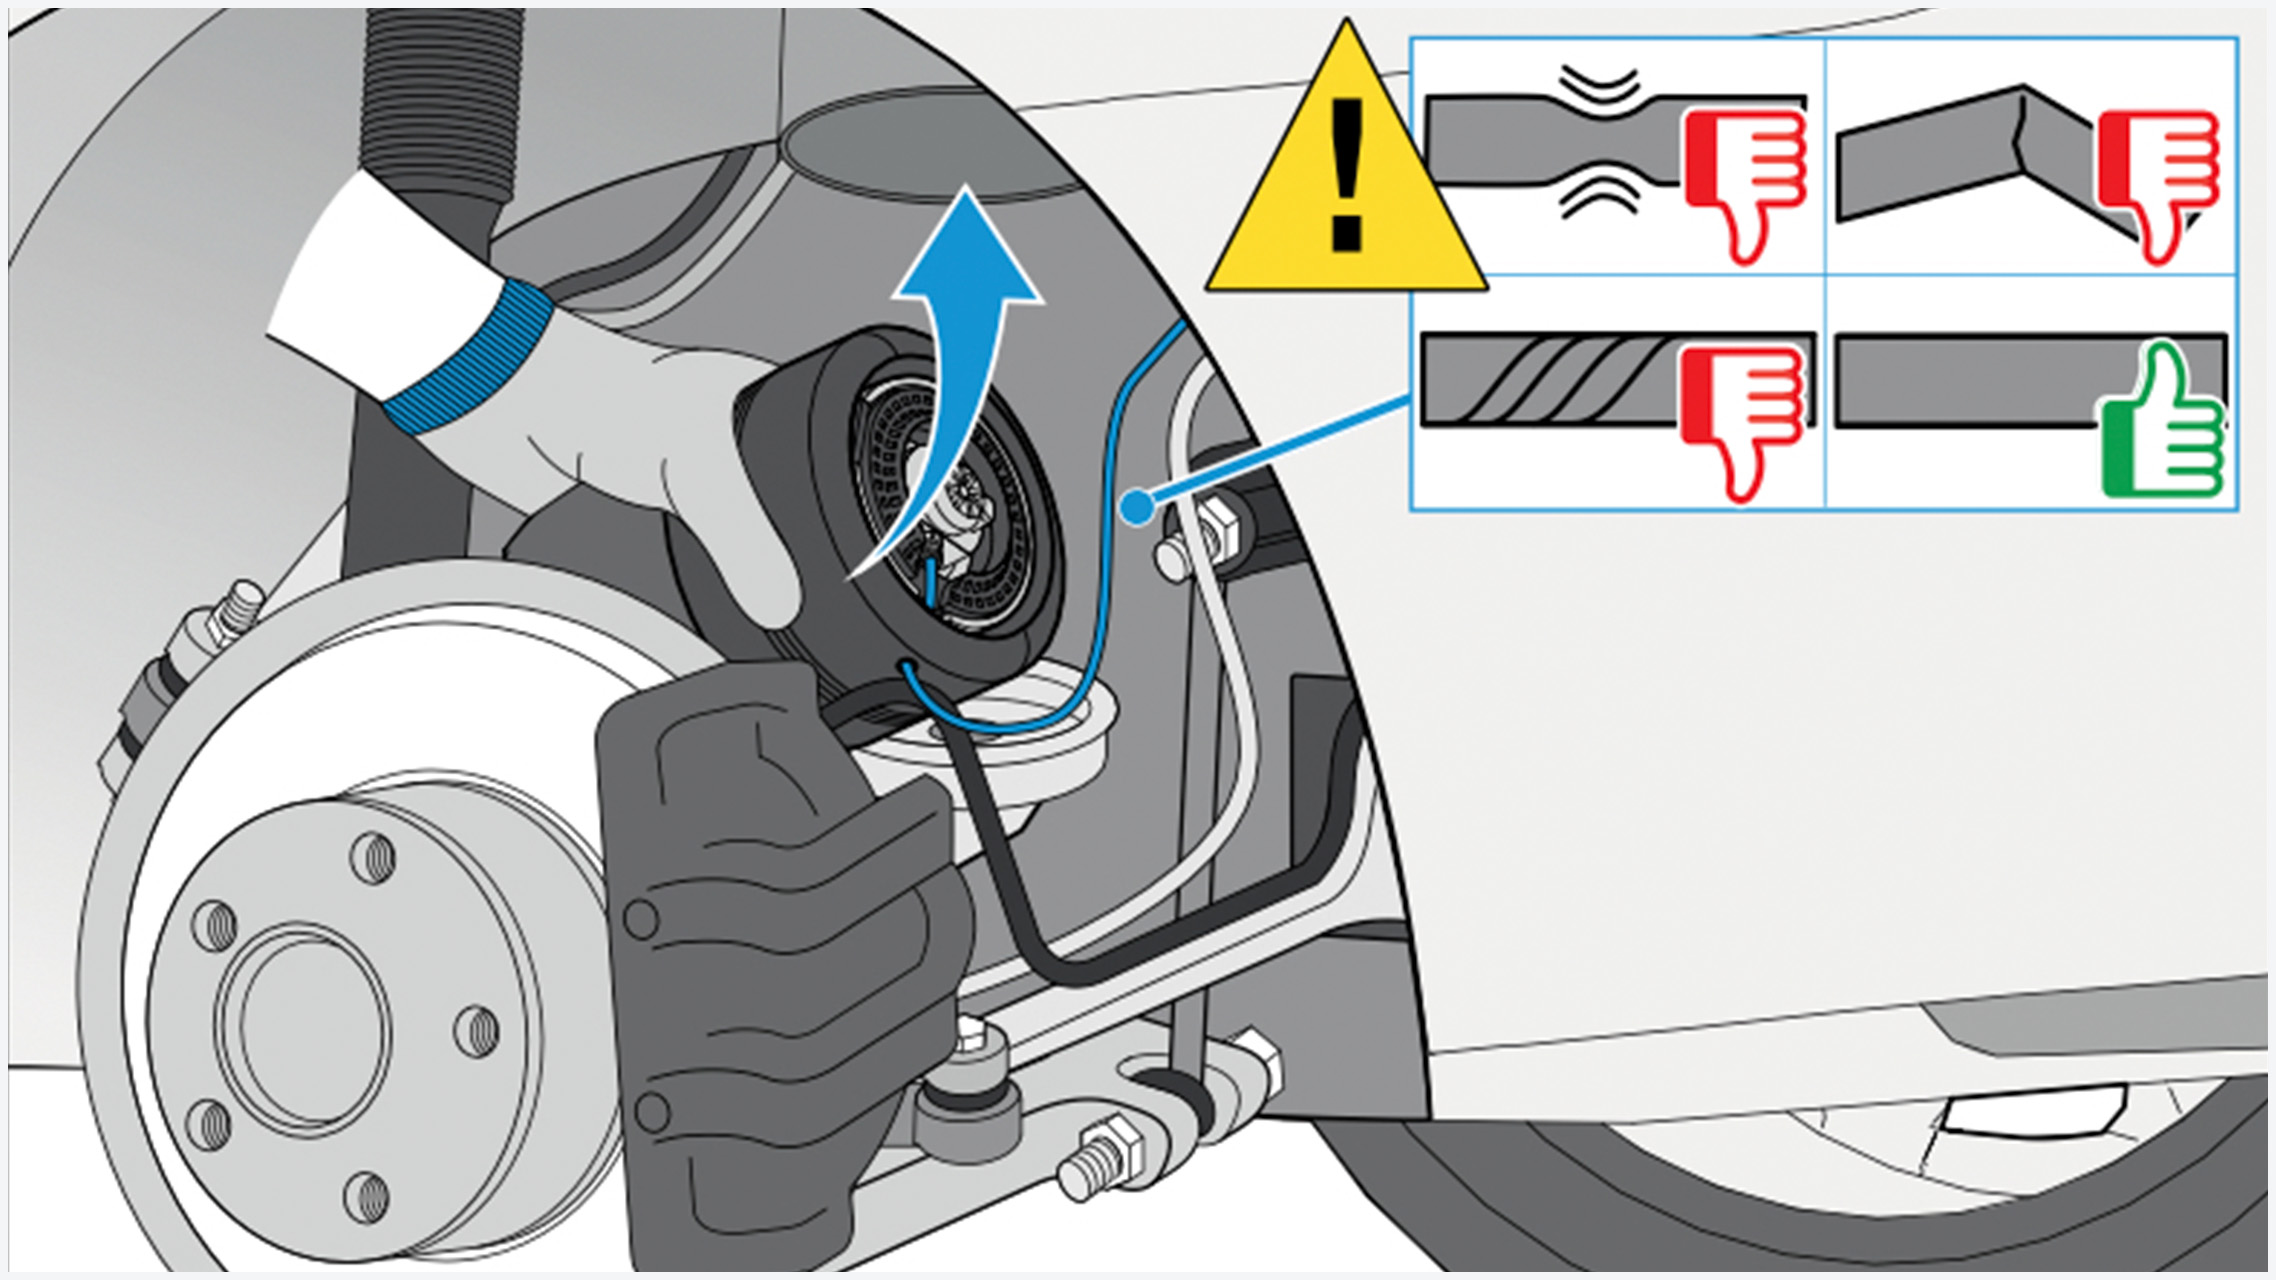
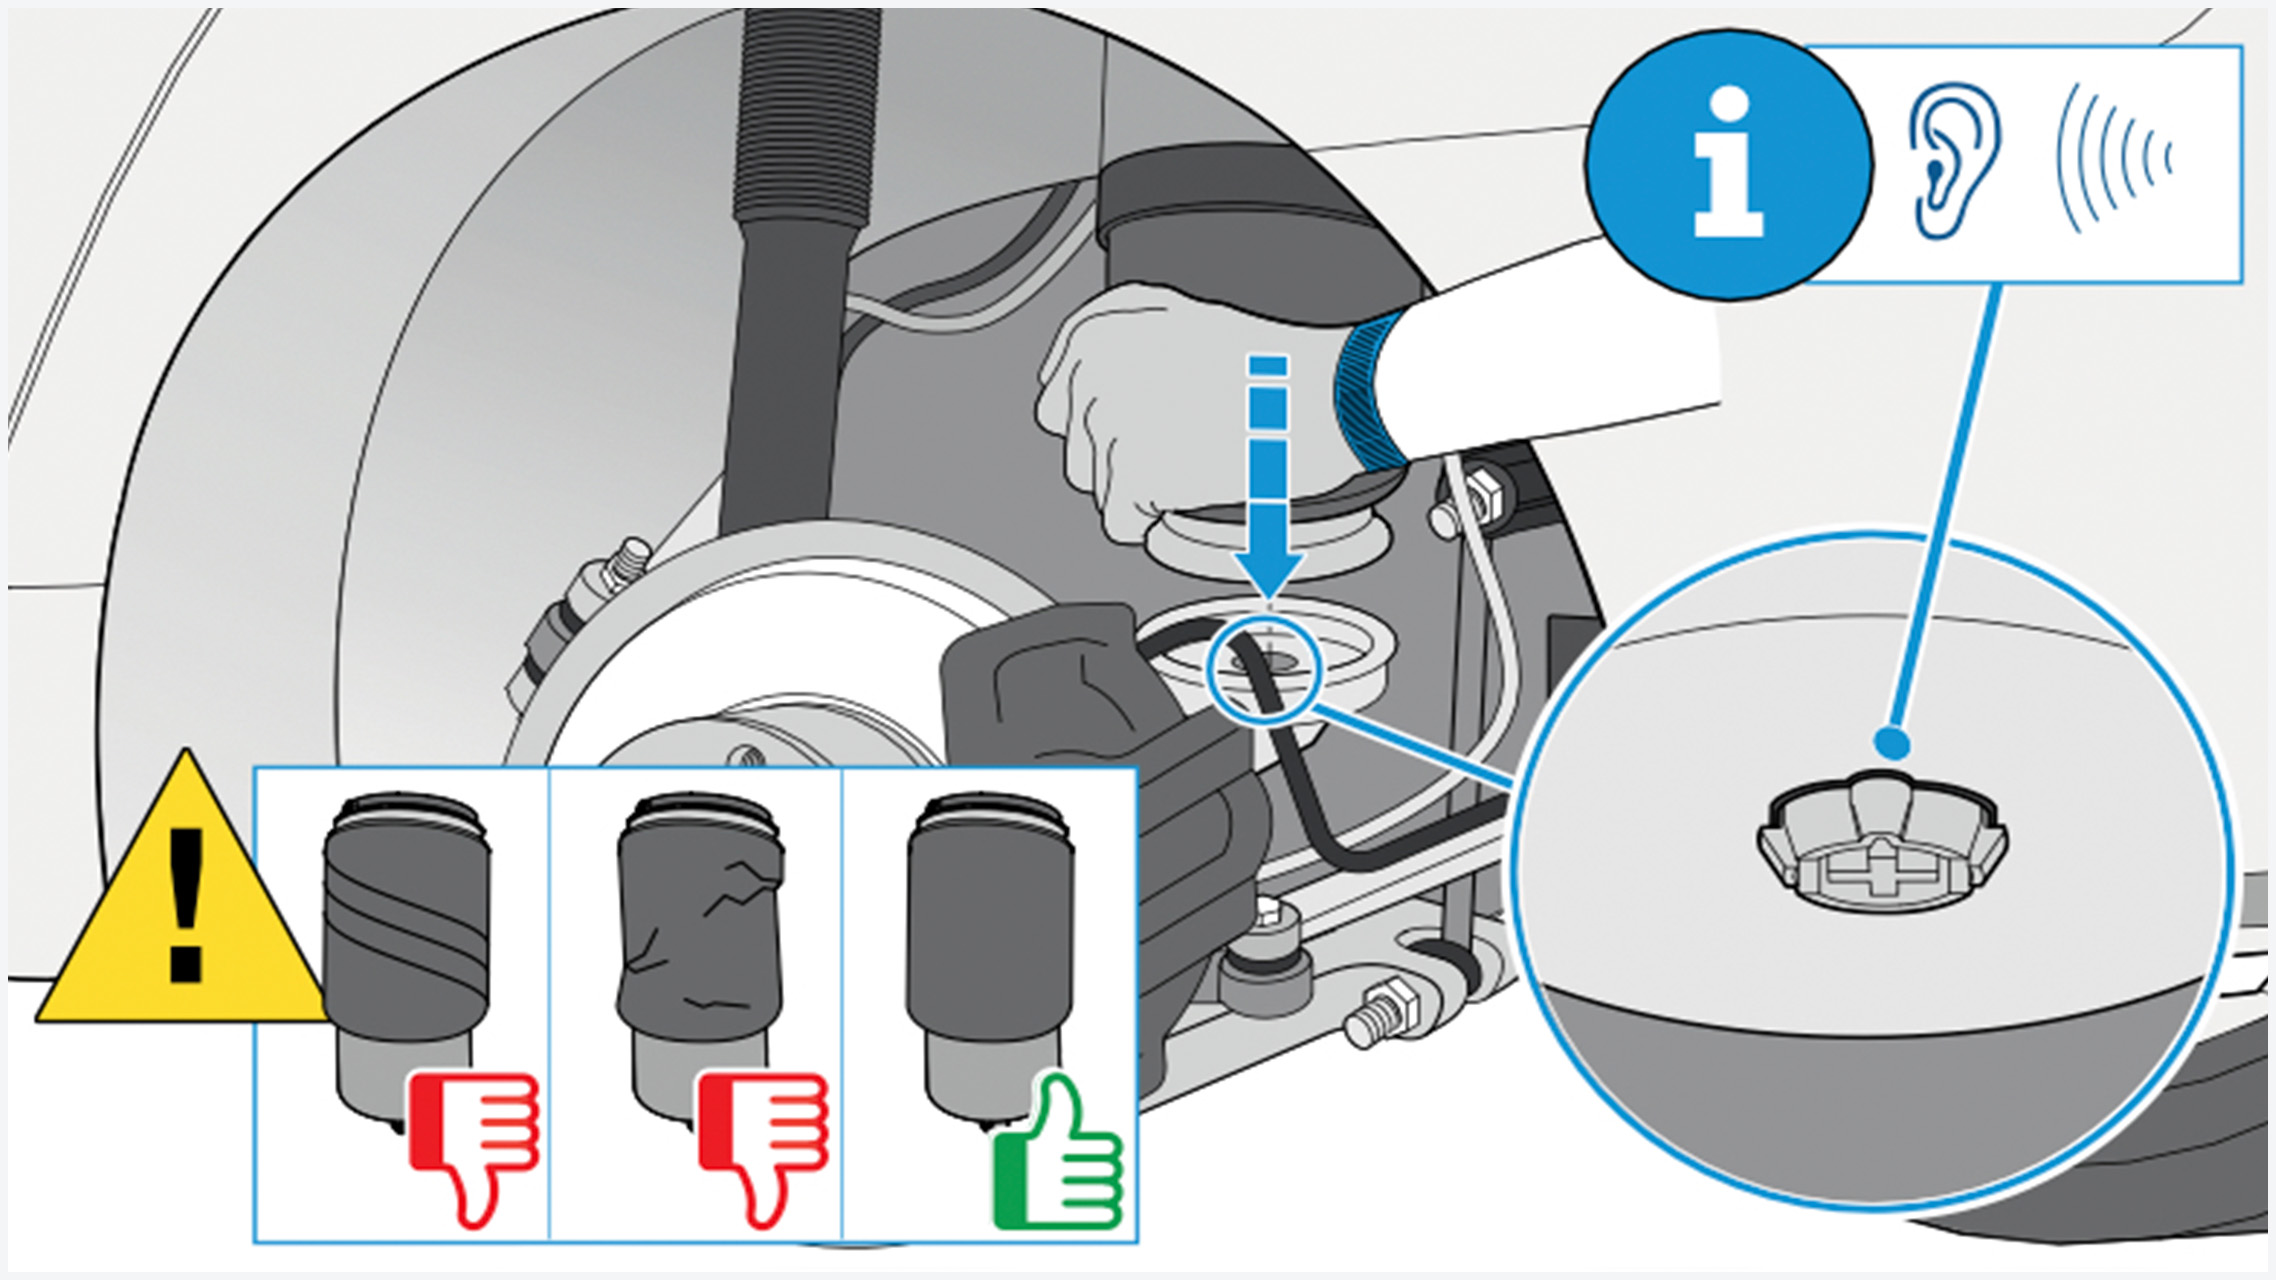
Step 4: The removal of the air spring
Then switch off the ignition and raise the vehicle to the working height. Now remove the wheels and press the lower part of the air spring out of the mount.
Attention: This must absolutely be done by hand and not with a tool!
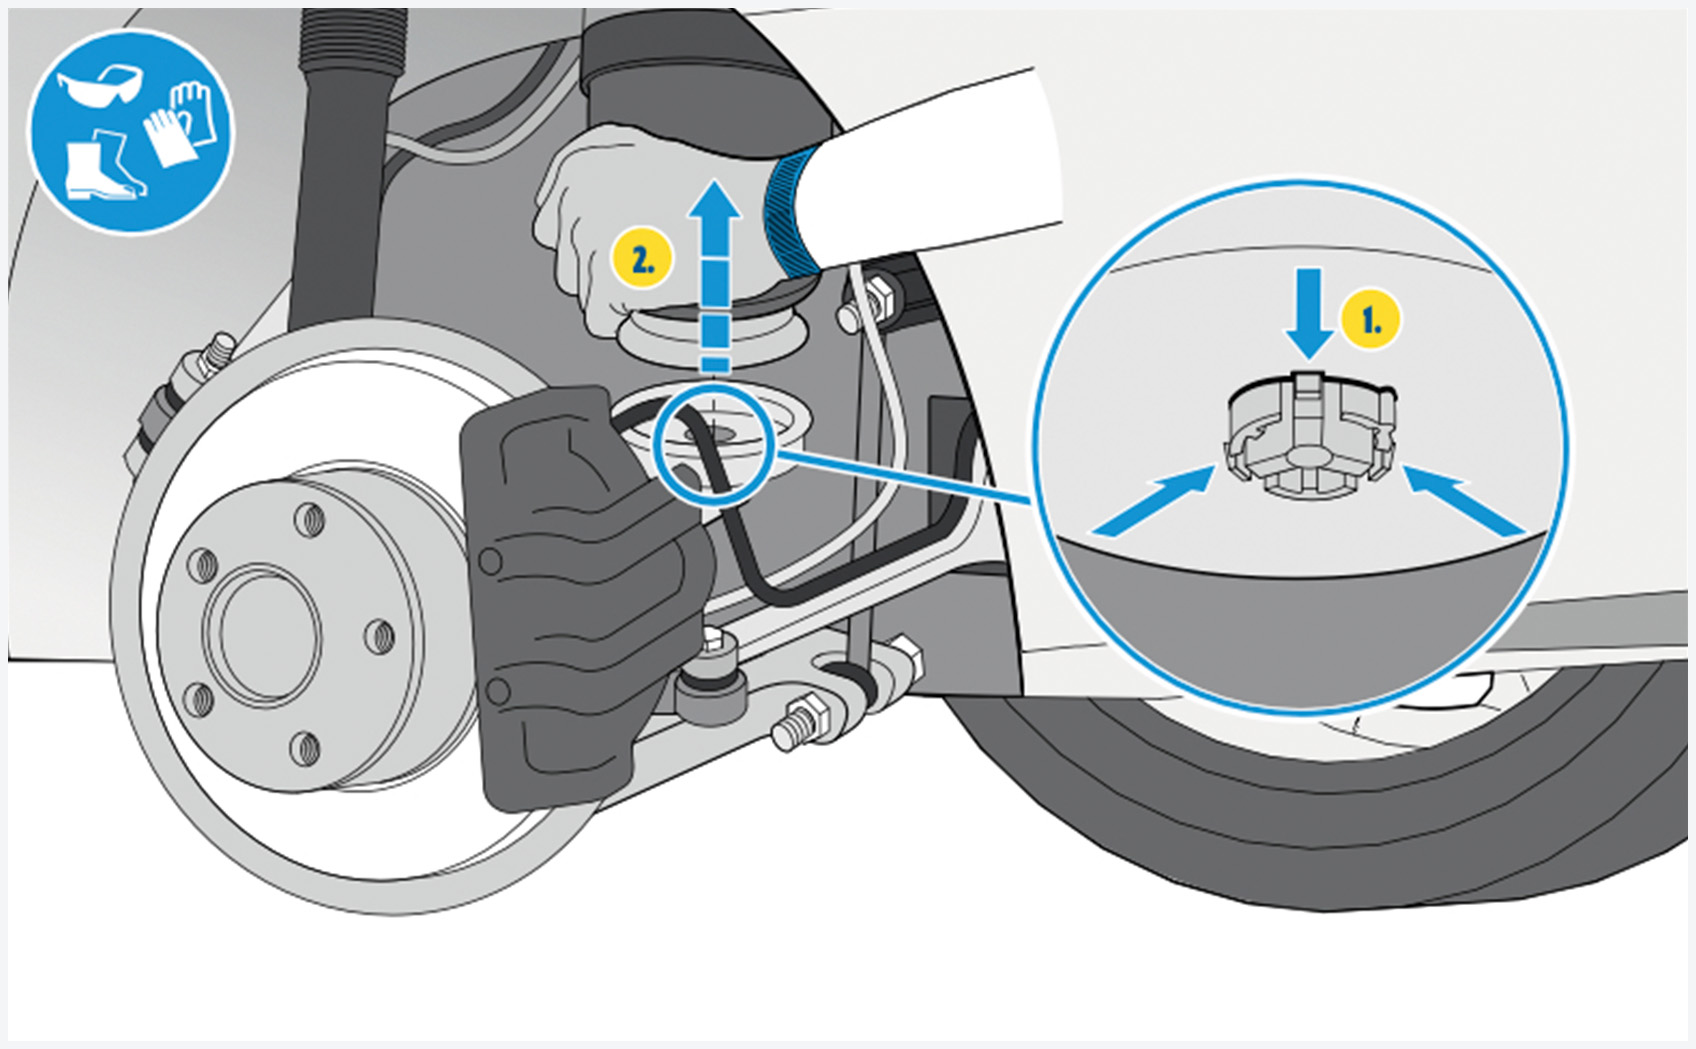
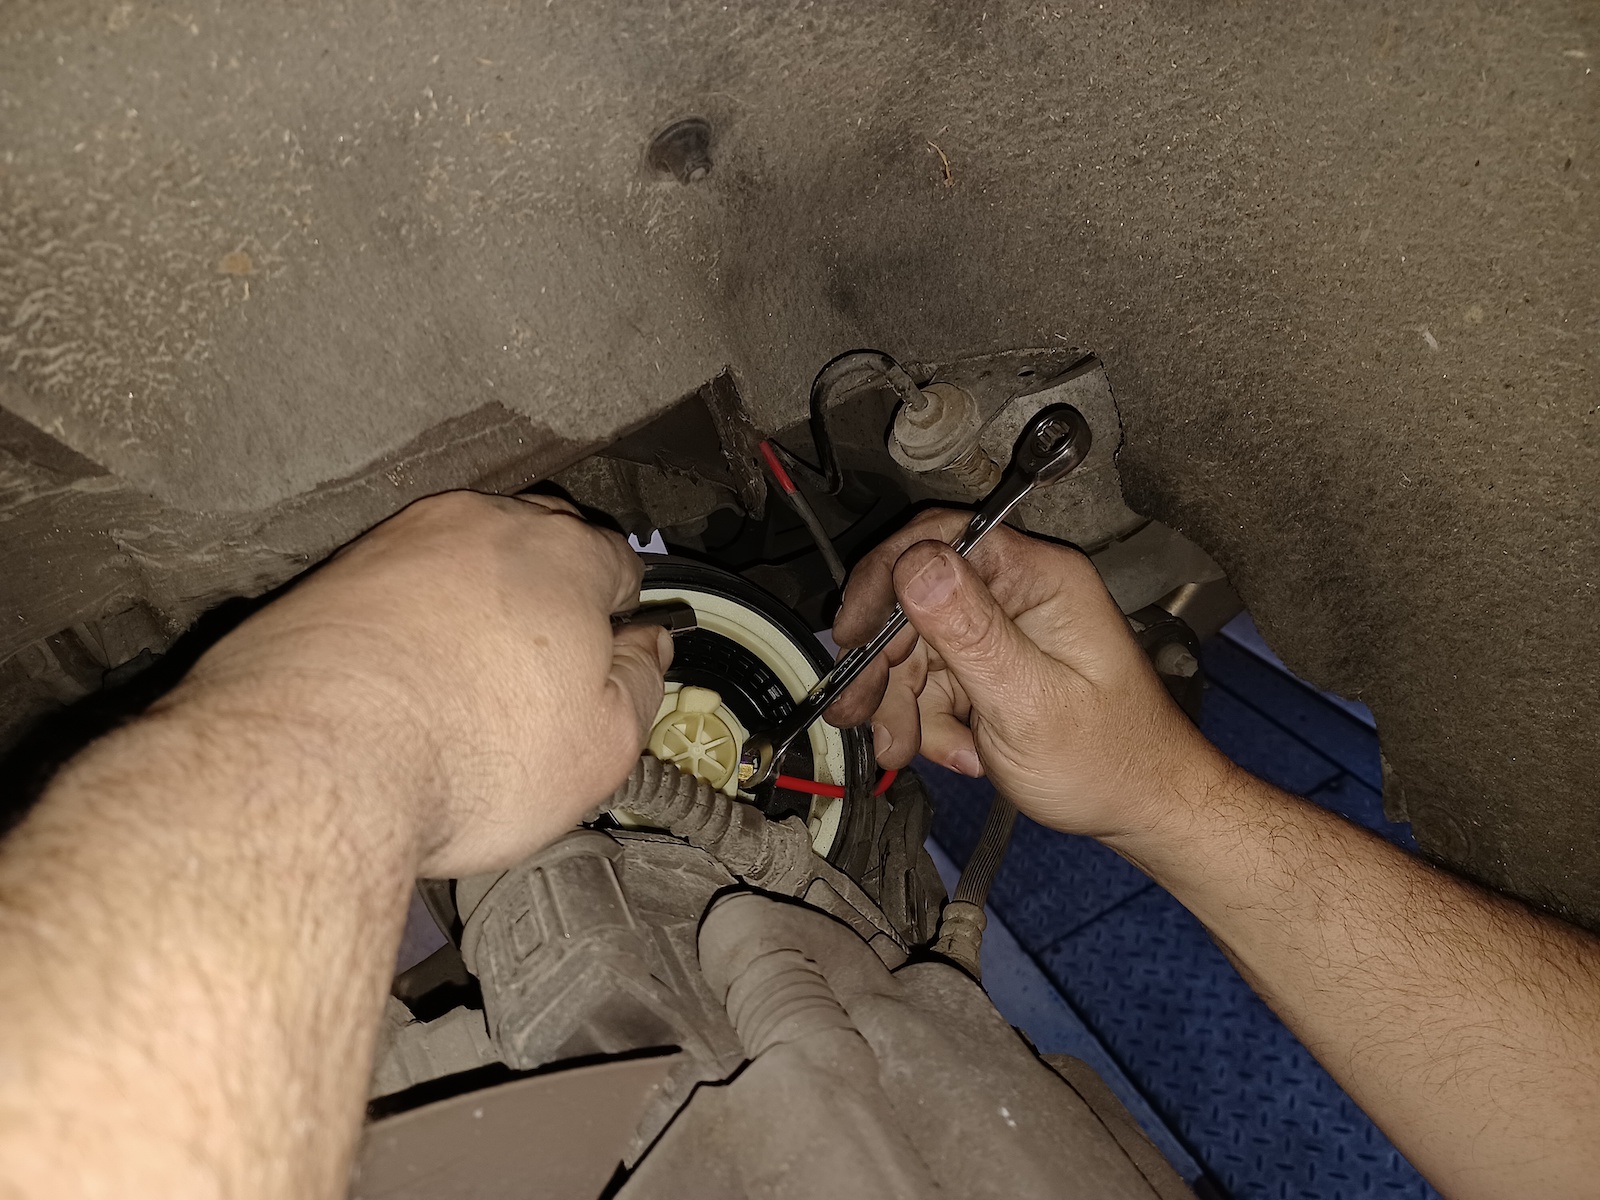
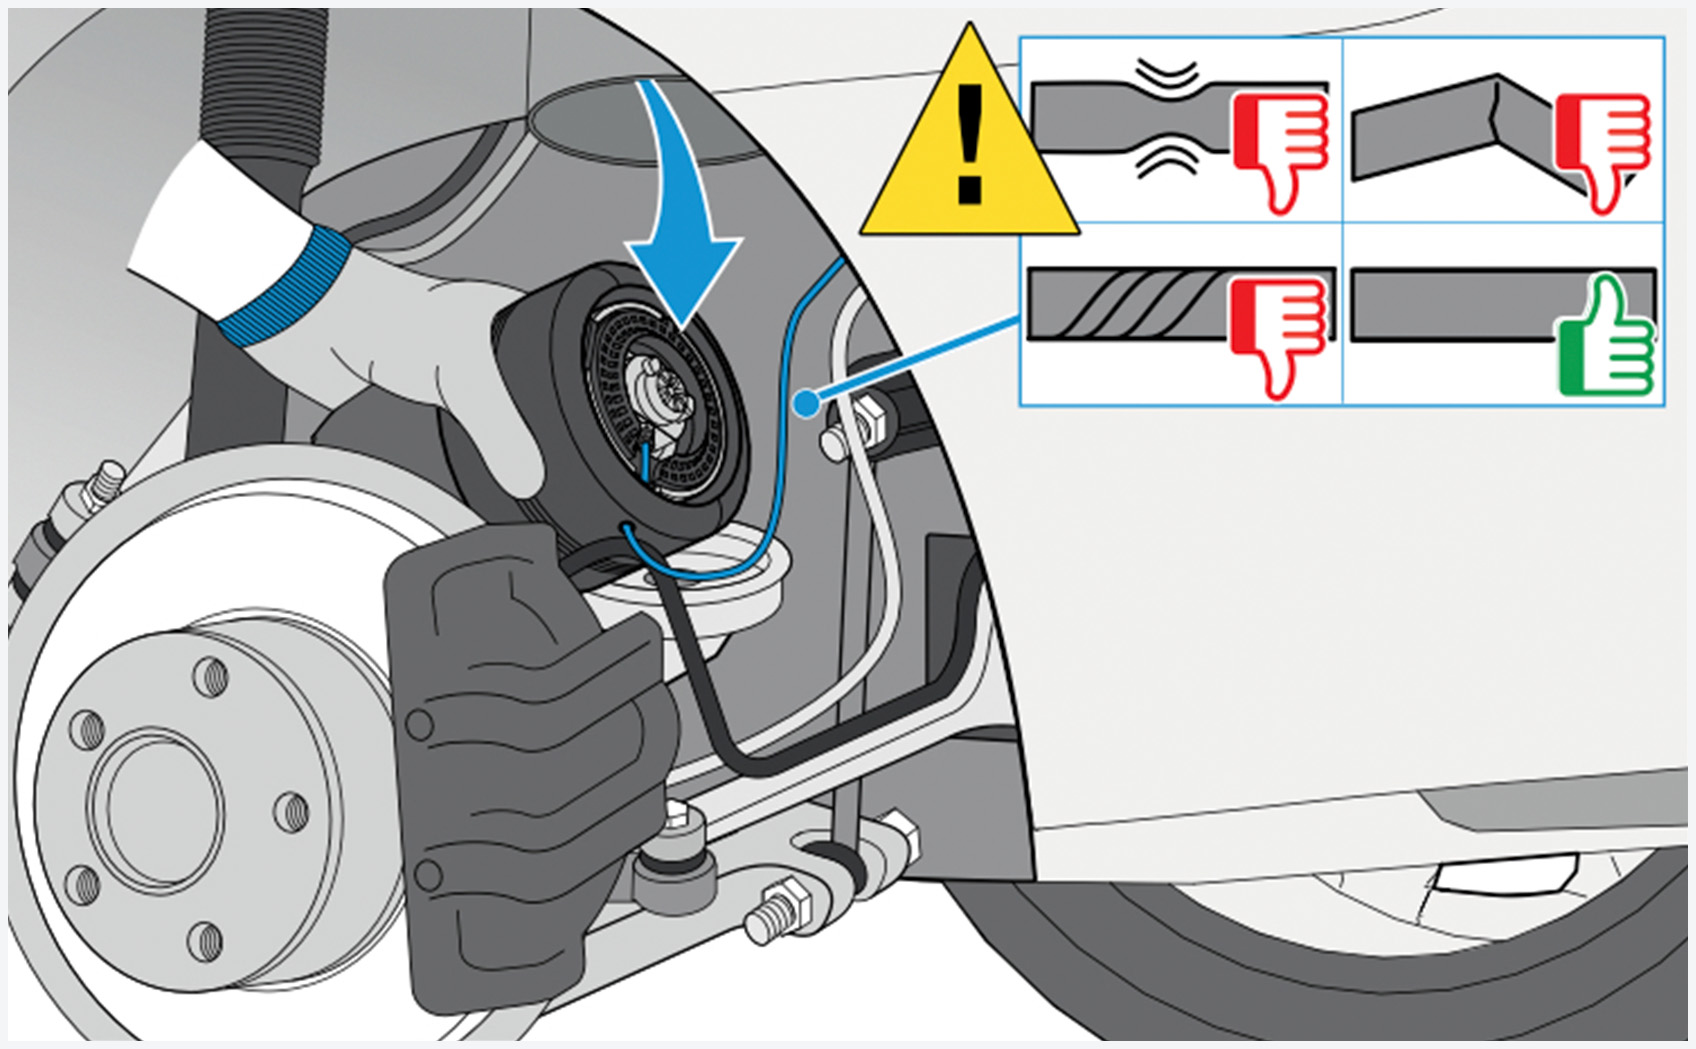
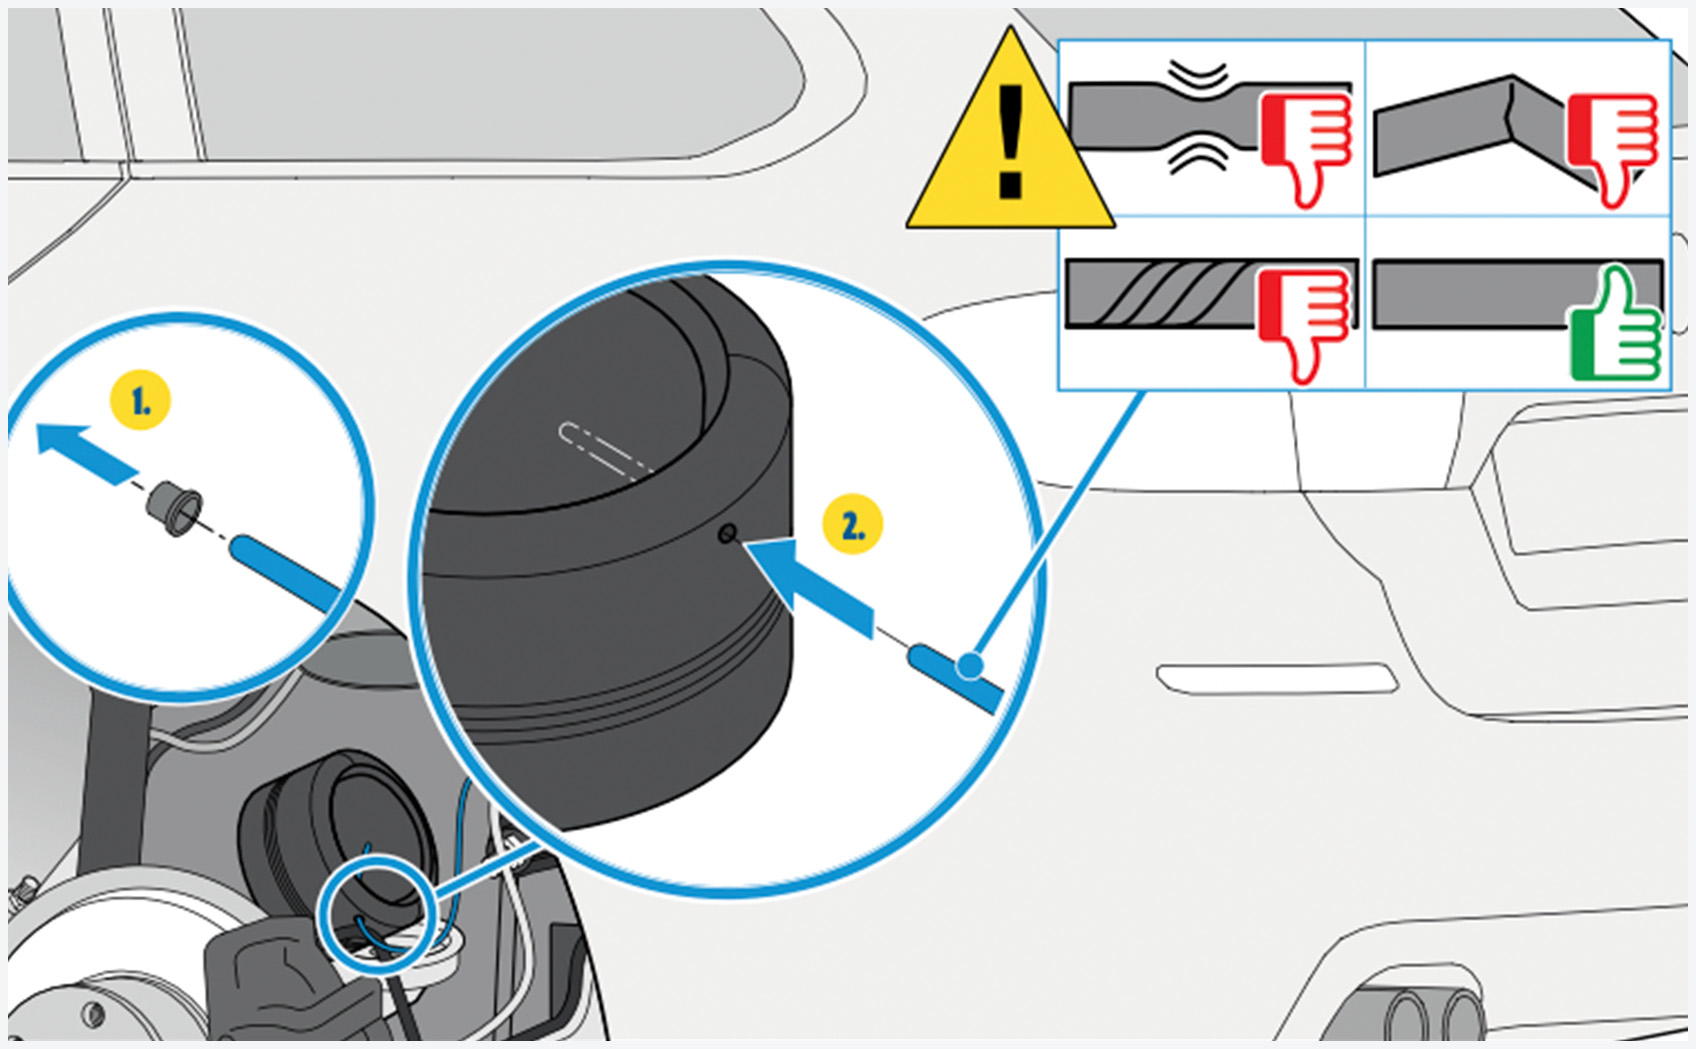
Next, twist the air spring by about 30 degrees until it is completely detached from the bracket. To remove the spring, tilt it sideways and place it on the control arm so that the hose line is visible and can be disconnected as the last connection to the vehicle. For this step, the banjo bolt is loosened and removed along with the conical ring. Then pull the air hose out of the guide of the protective bellows. Under no circumstances should this be cut “to make work easier”.
Step 5: Insert the air spring
Now it’s time to install the previously correctly determined spare part. Ideally, of course, it should be an air spring from the BILSTEIN B3 range in 100% OE quality. Before this, however, the axle carrier must be cleaned and checked, as this serves as the connection for the air spring. Then the hose of the new air spring is fed through the protective bellows and fastened to the vehicle’s air line with the banjo bolt – don’t forget the conical ring.
Note: Observe the position marking when doing so.
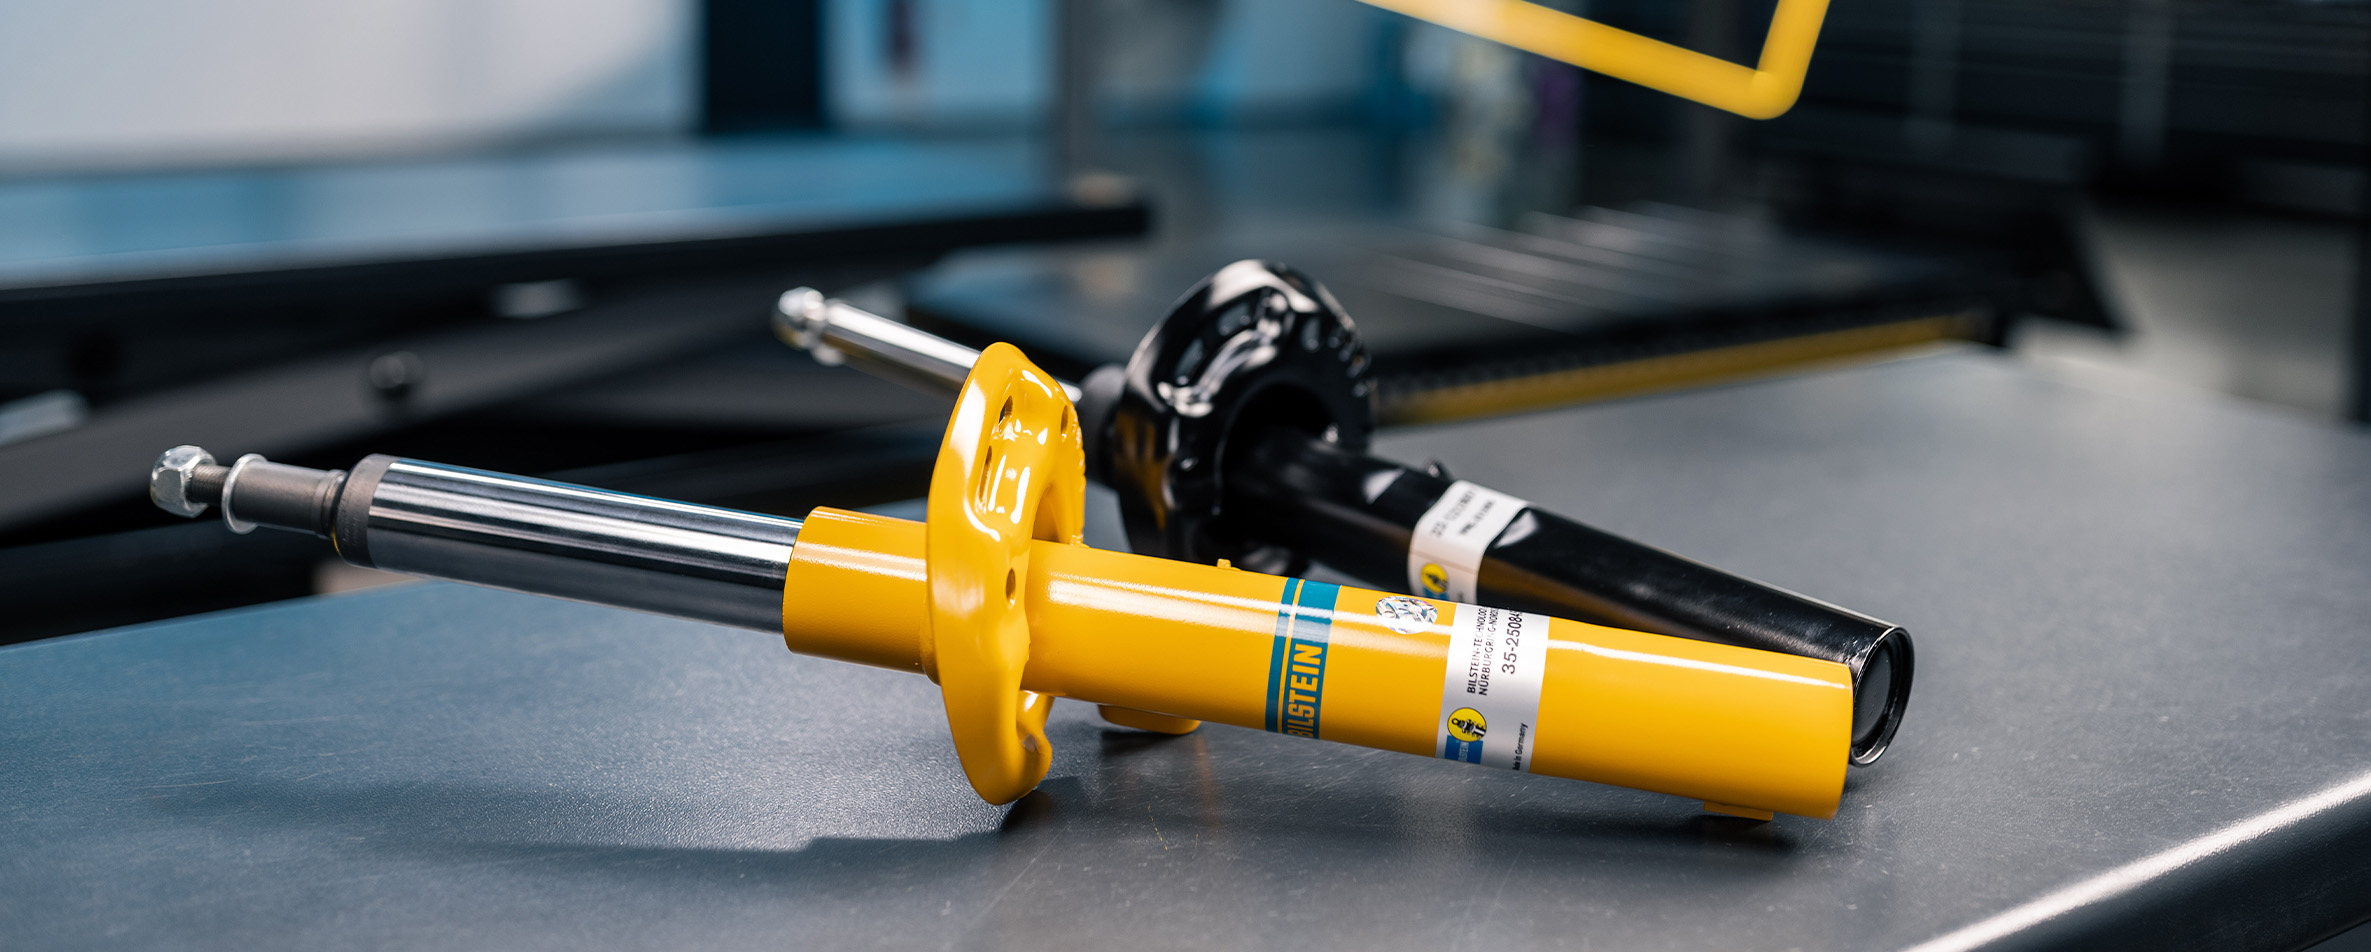
BILSTEIN B3 air spring
The BILSTEIN B3 air spring is the ideal original spare part for vehicles in which the air spring and shock absorber were not installed in one module, but separately.
Learn more about the product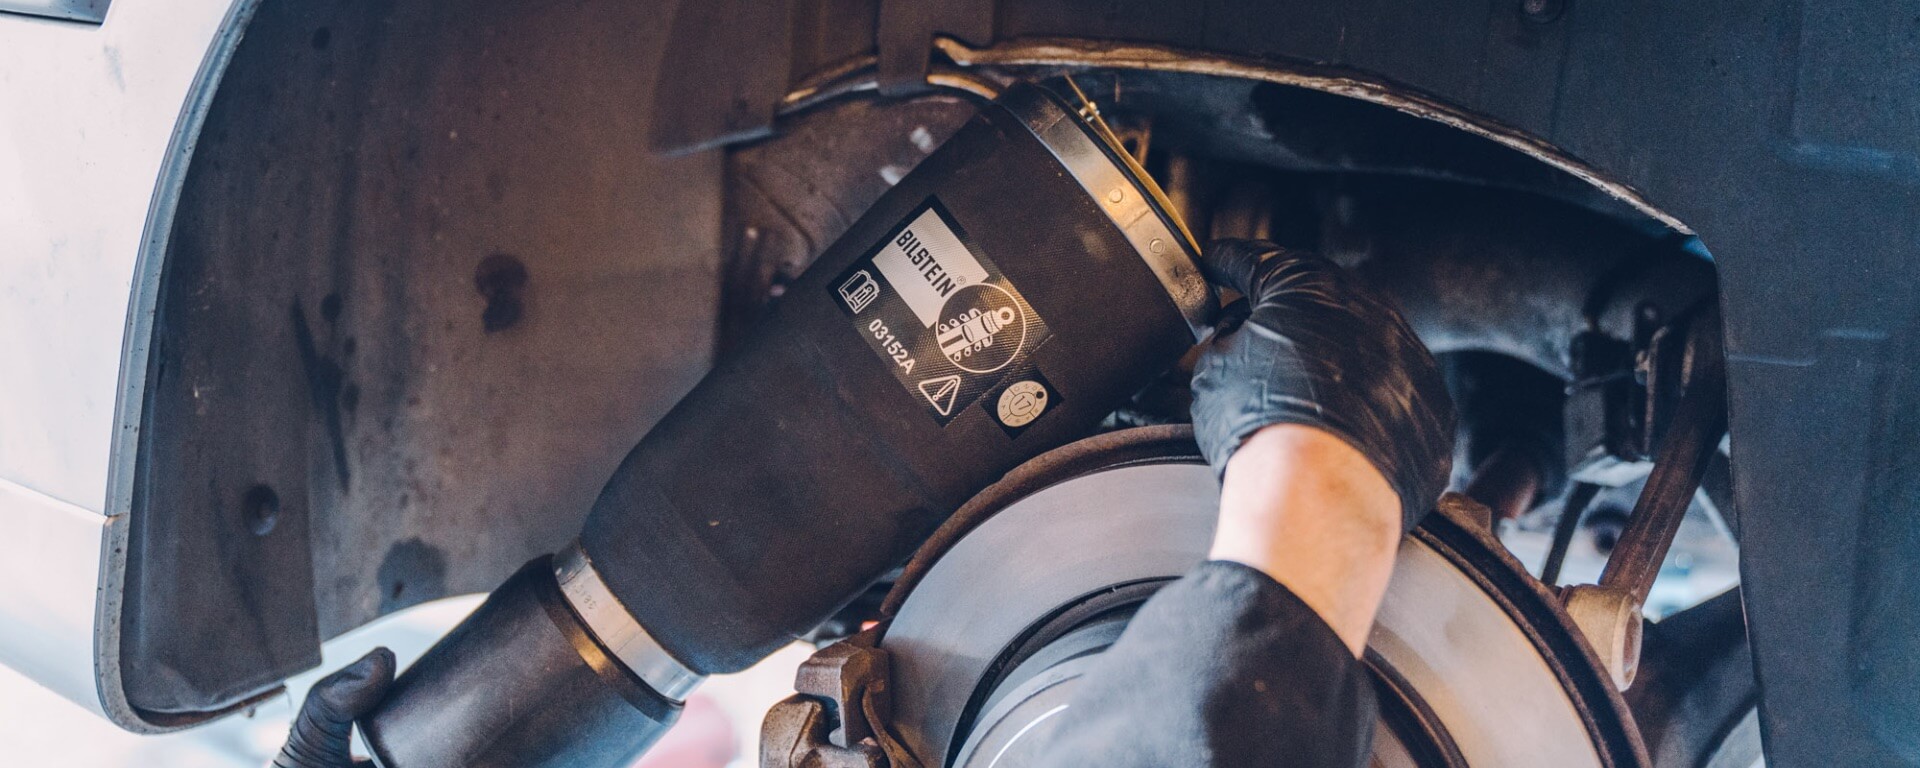
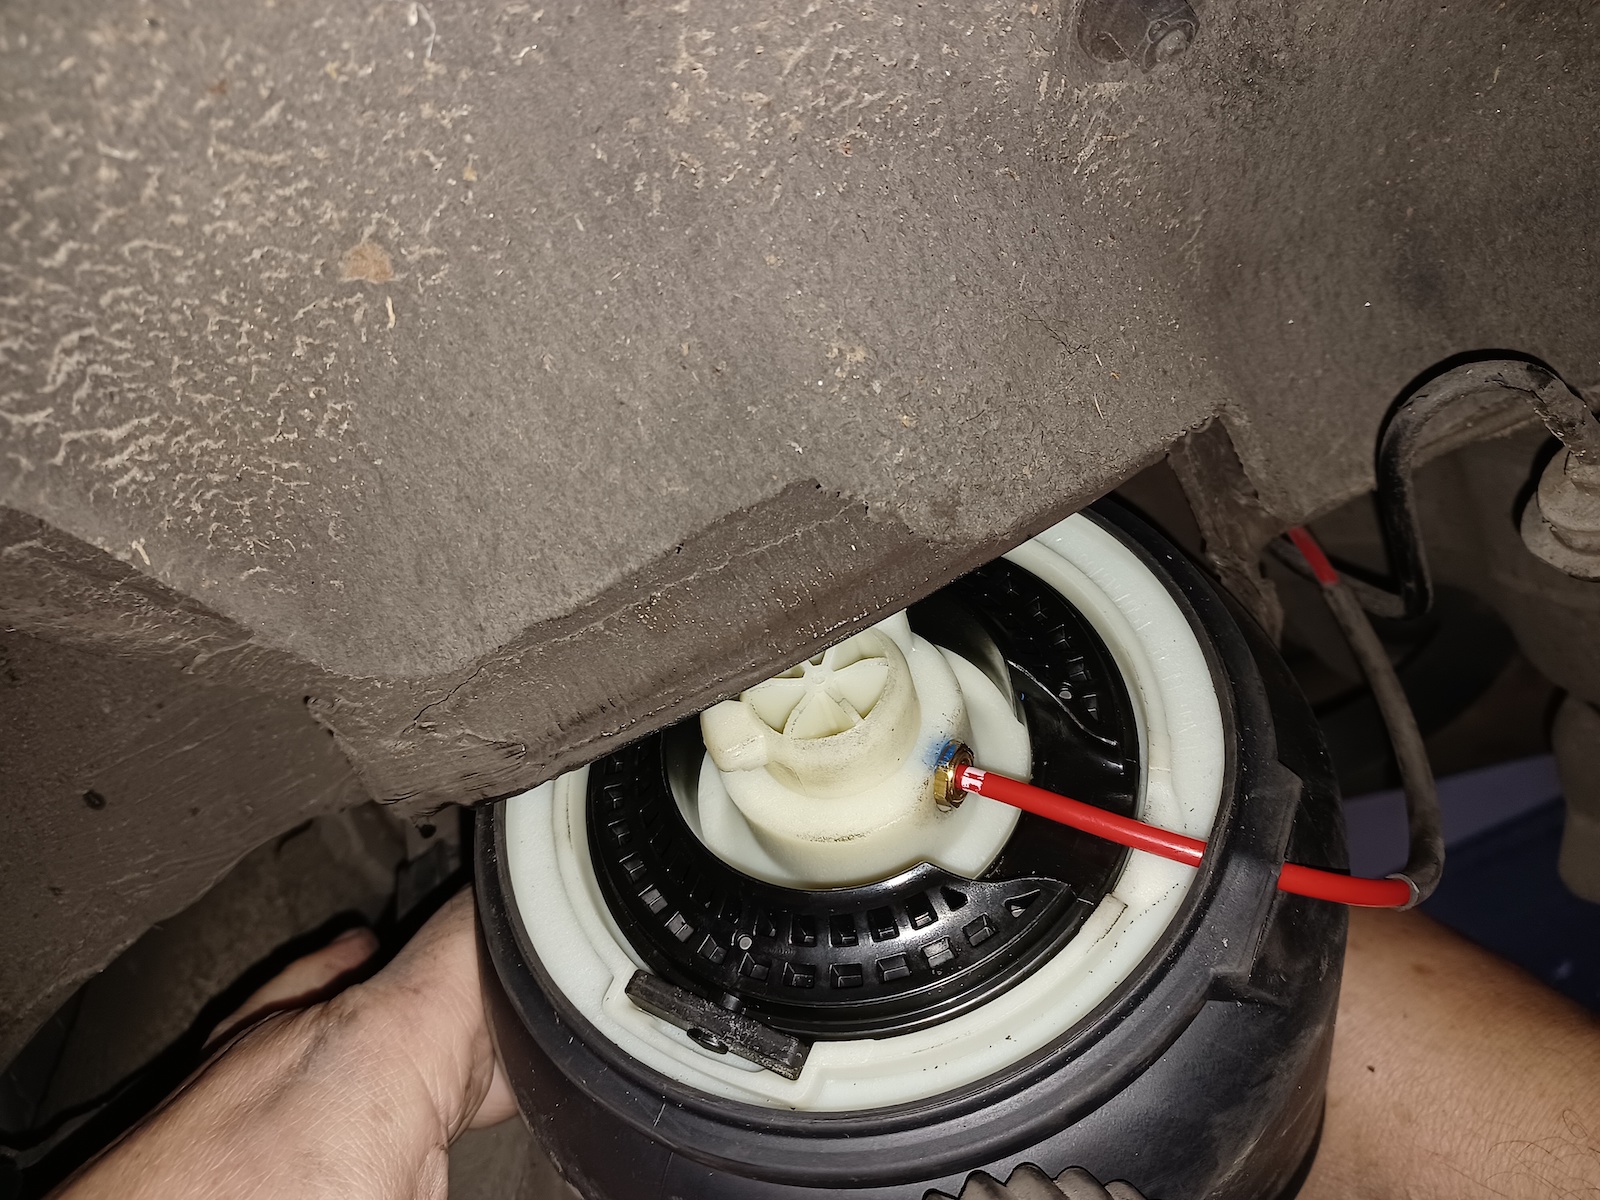
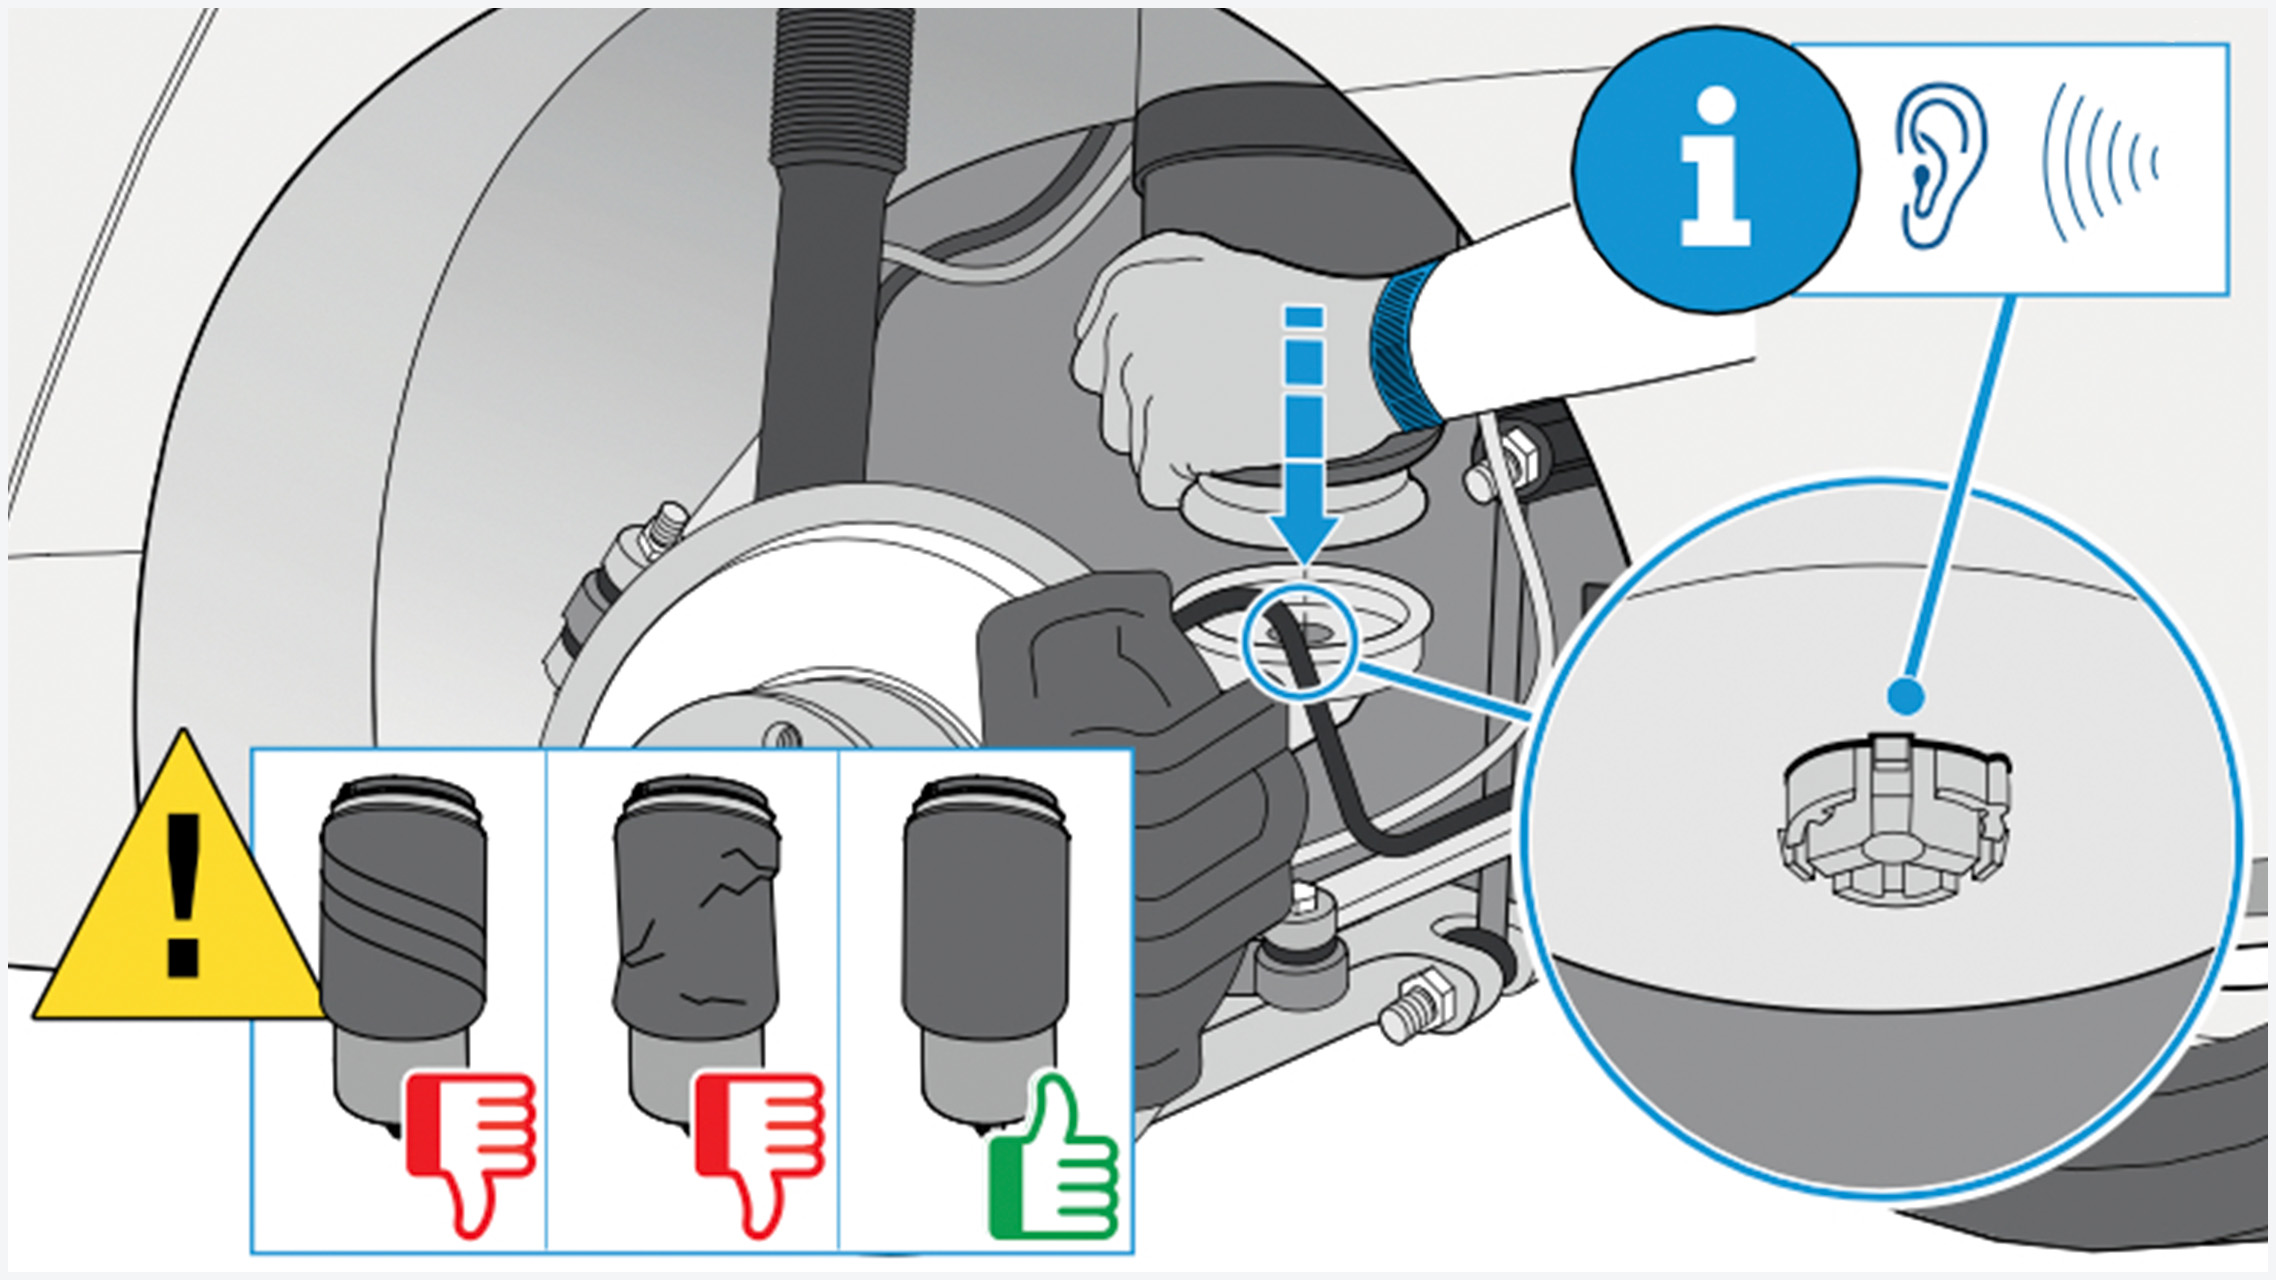
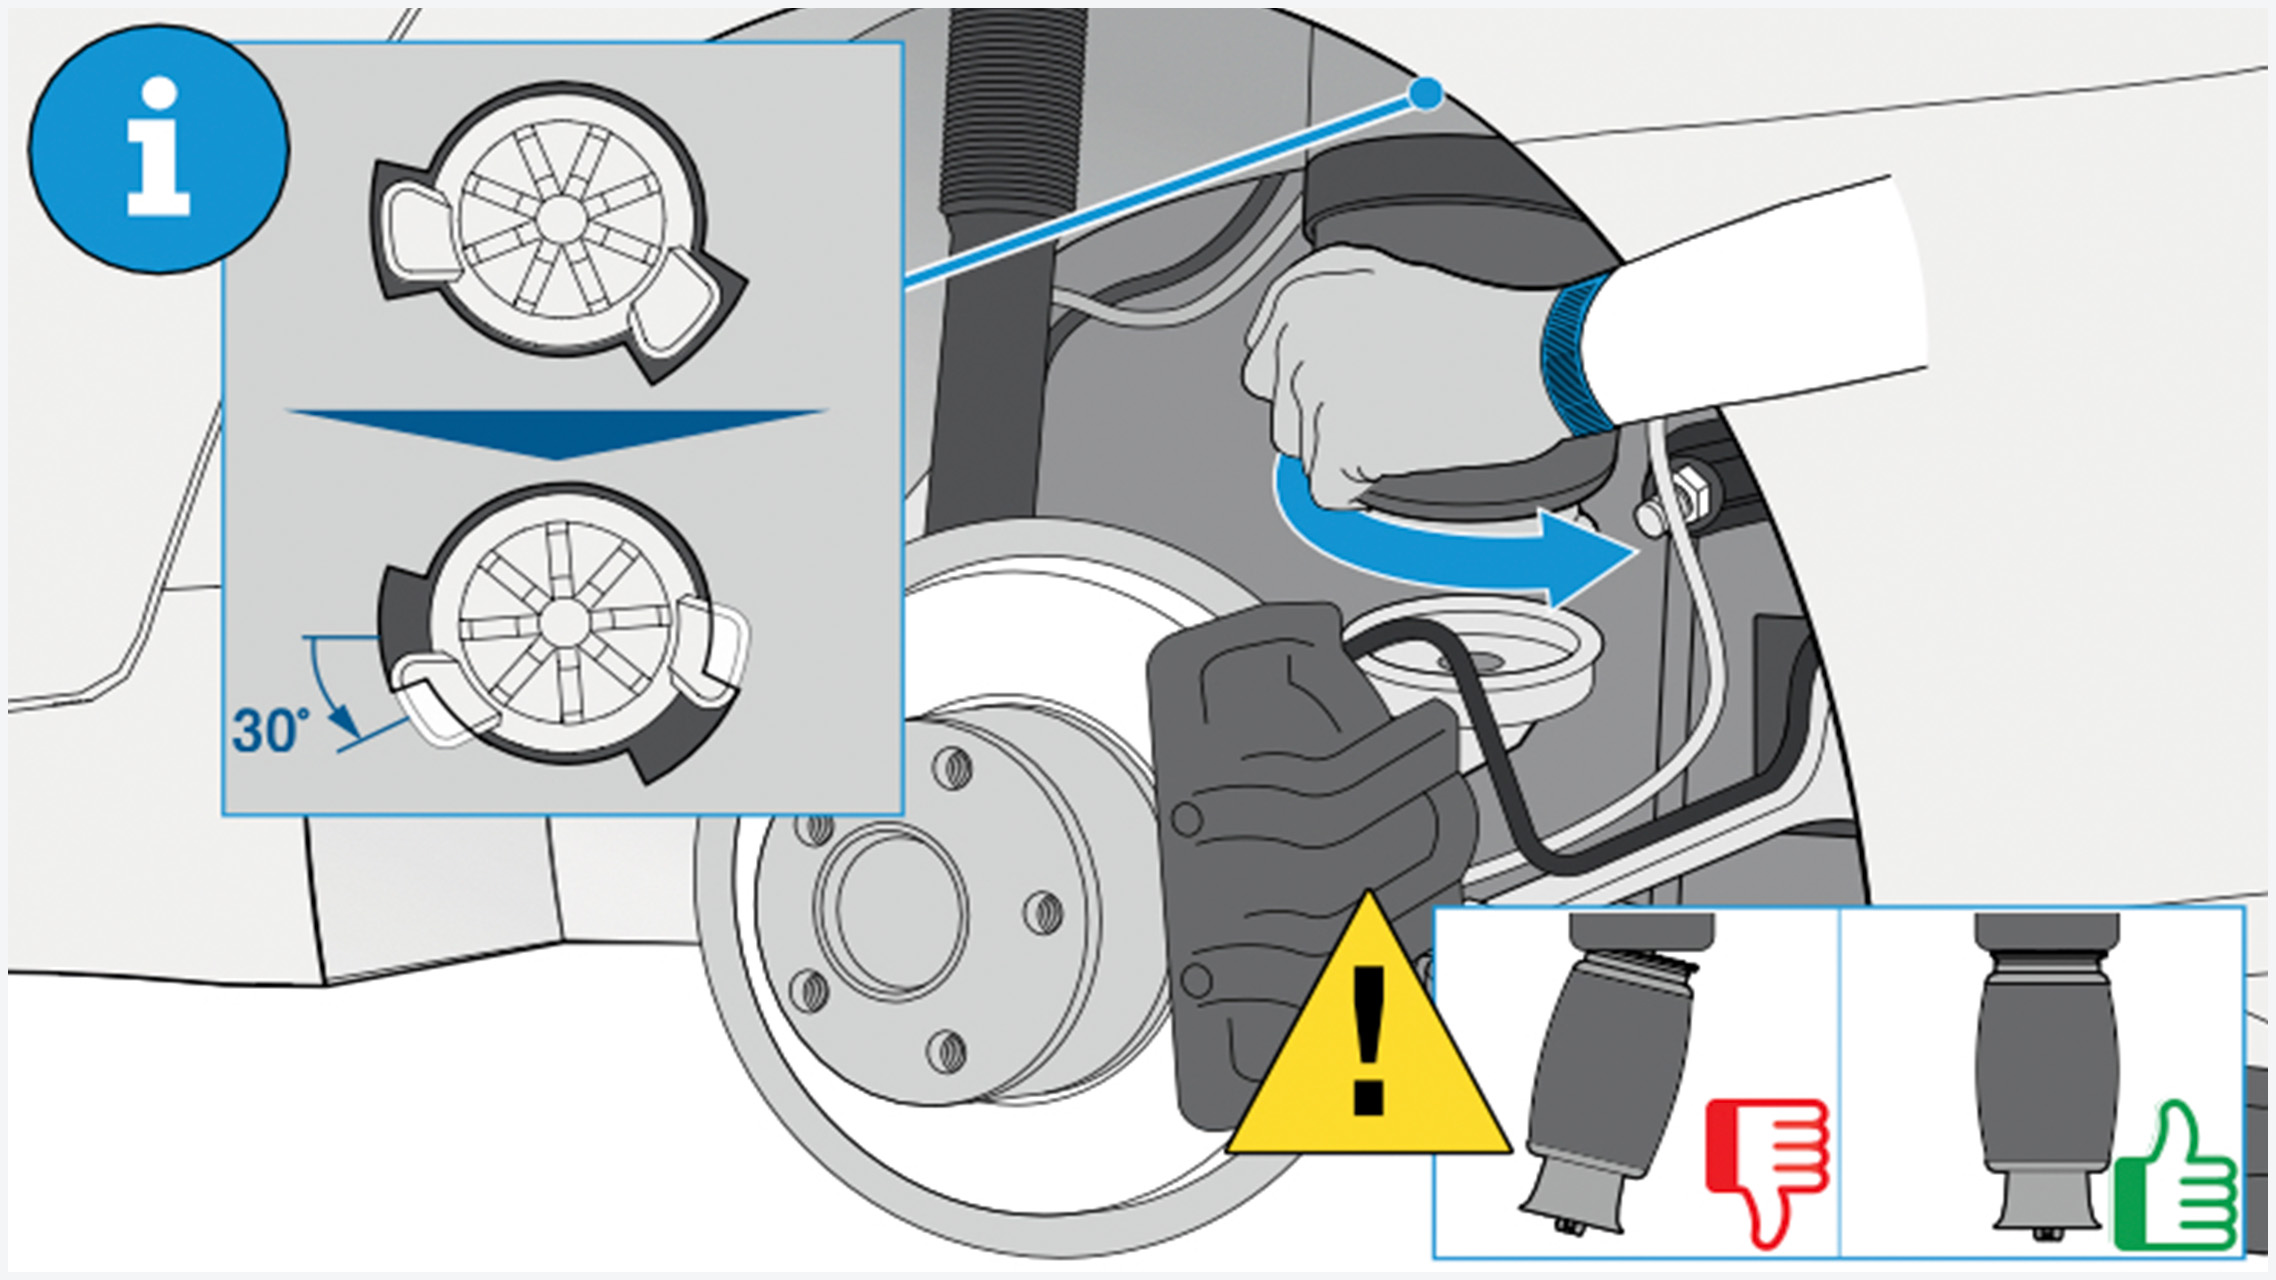
Step 6: Align the air spring
Next, insert the air spring into the mounting cup and turn it clockwise as far as it will go. If necessary, correct until a correct hold is given. Then press the lower part of the air spring by hand into the guide bracket until it audibly locks into place.
During all work steps, make sure that hose lines are not twisted, crushed or otherwise unduly stressed. For the air spring itself, check that the rolling fold is formed evenly.
Step 7: Securing and filling the air spring
Now the filling and commissioning takes place: To do this, reinsert the fuse, mount the wheels and lower the vehicle so that the distance between the lower edge of the tire and the ground is approx. 30 cm. Now switch on the ignition and refill the air spring with the diagnostic tool.
Step 8: Carefully lower the vehicle
Before the vehicle is completely lowered from the lift, we recommend running the engine for about two minutes. This measure ensures the necessary pressure in the system. Under no circumstances should the car be placed “on its own wheels” with the air spring deflated, as this could irreparably damage the air springs.
Step 9: Do not forget the test drive
All that’s left is the obligatory test drive and the cross-check of the K0 location based on the notes made beforehand. If everything is OK, the vehicle can be handed over to the customer.
Become a suspension professional with the BILSTEIN Academy
We pass on our accumulated know-how to you and turn you into a shock absorber and suspension professional: Whether you are a dealer or a workshop – the BILSTEIN Academy offers the right training program for every focus.
Information & registration
Reading tip: If you’re interested in tuning, our guide to BMW tuning might be just what you’re looking for.